DEC StorageWorks BA350 Narrow SCSI Shelf
The BA350 is a Narrow SCSI StorageWorks shelf that accepts Narrow SCSI devices only. It's available in both rack-mount, and pedestal form. Both units I have are the pedestal variant (sold as BA350-K series). The BA350 shelf itself can be removed from the pedestal mounting kit by unclipping both the front and rear bezels, then the top and bottom parts that hold the shelf itself.


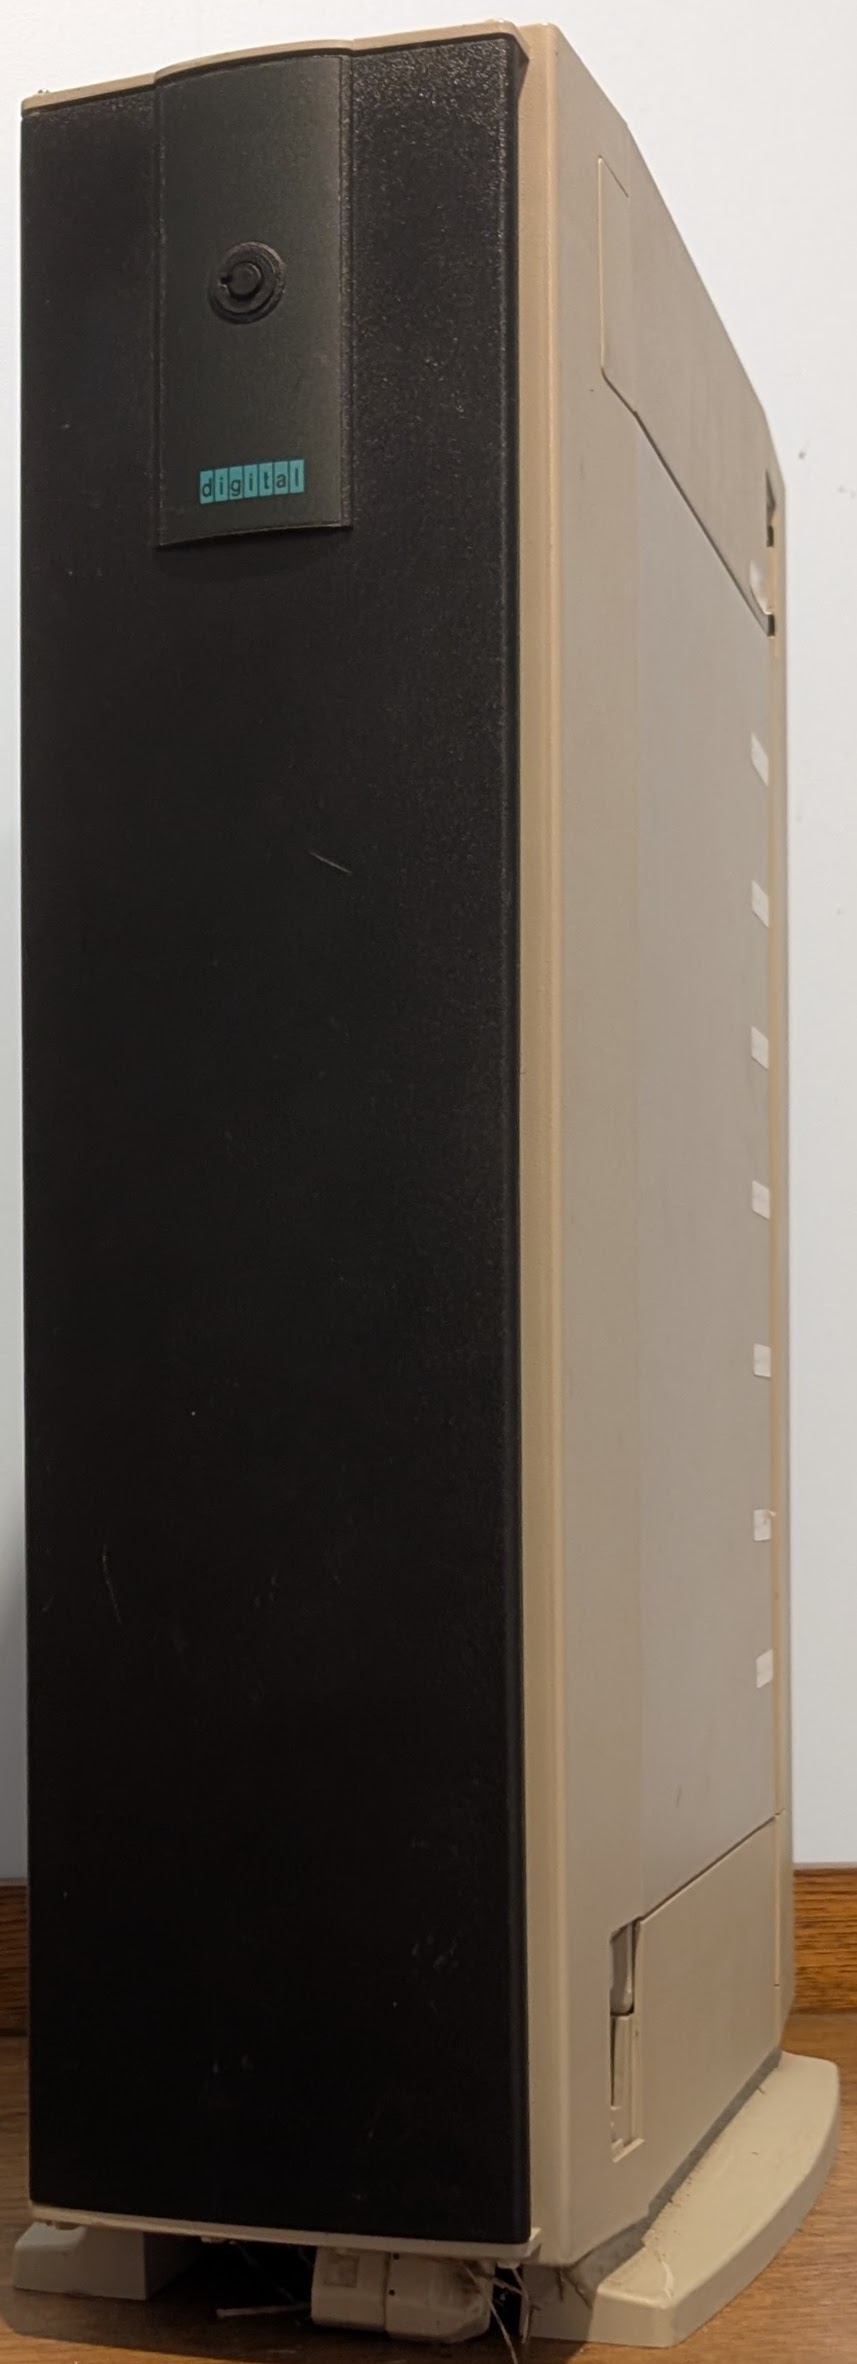

I have two of these both in pedestal form. The one pictured above is marked as a SWXSE-06 and is equipped with dual speed blowers and has a nice logo on the front, while the other is labeled as a BA350-SB and seems to have only single-speed blowers. Both of the doors on this second one are the same as the rear door pictured above. I got both from the same place back in the early-mid 2000s, but these days I'm rather short on narrow SCSI disks so these haven't got much use in a while now.
SCSI Connector
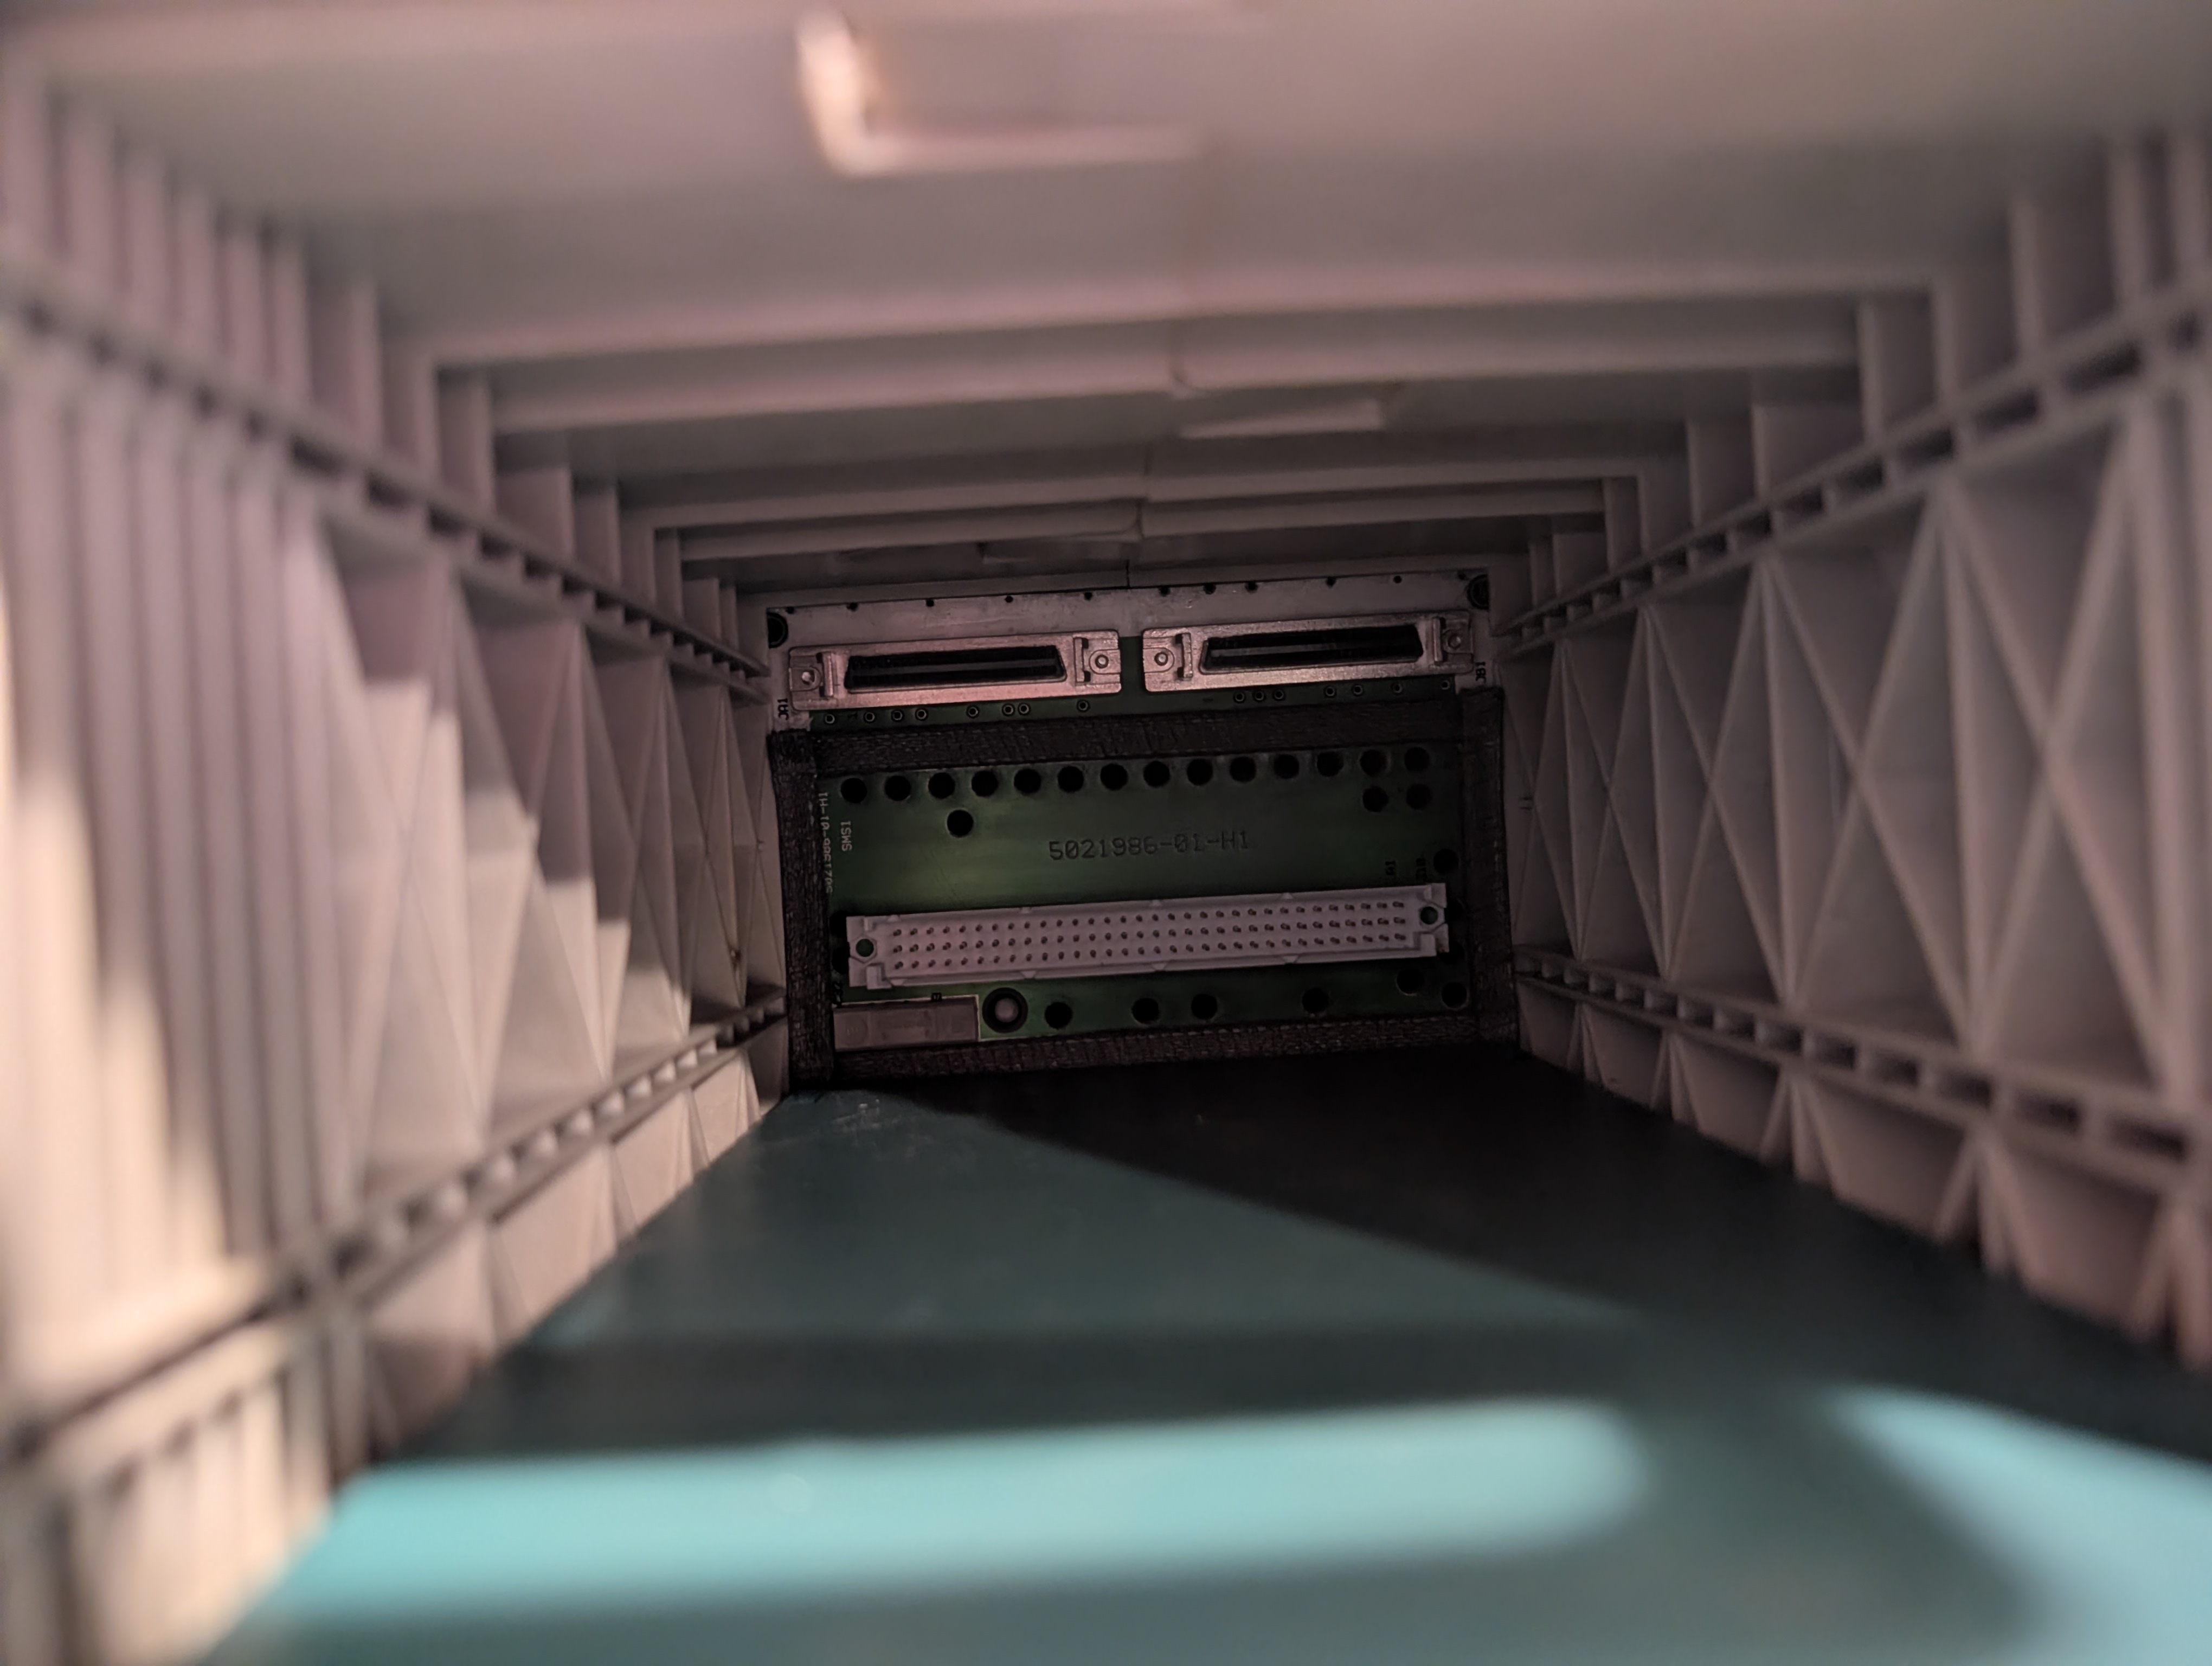 The SCSI connector on the BA350 shelves is unhelpfully on the backplane
itself which makes it quite hard to get at. You'll have to remove at
least the top disk to get your hand in there, and you'll need SCSI
cables that can be easily unlatched in such a tight space. DEC
recommended their BN21H-xx cables for use with the BA350 shelf.
The SCSI connector on the BA350 shelves is unhelpfully on the backplane
itself which makes it quite hard to get at. You'll have to remove at
least the top disk to get your hand in there, and you'll need SCSI
cables that can be easily unlatched in such a tight space. DEC
recommended their BN21H-xx cables for use with the BA350 shelf.
Power
To operate, you need at least one Power Supply installed in either slot 6 or 7 (the bottom or left-most slots). If you're going to operate the shelf with only one power supply, put it in slot 7 (counting from zero). If you want redundant power supplies, put them in slots 6 and 7.
If a power supply fails, then the LED closest to the power connector will go out, and the Shelf OK LED (the one furtherest from the power connector) on the remaining power supply will also go out.
Only six 7200RPM drives can be installed with the standard 131W power supply typically used with the BA350. Filling all slots with 7200RPM drives requires upgrading to a 150W power supply (part SWXBP-SD or BA35X-HF).
Power Distribution in Deskside/Pedestal Units
Deskside/pedestal units have a power distribution box down the bottom. On the front it has a power switch and two power cables that plug into power supplies in the bottom two slots. Around the back is an IEC power input connector, and a third power cable for daisy-chaining the power for multiple pedestal units together.
Cooling
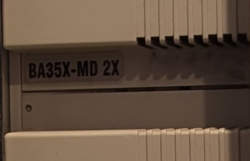 The BA350 shelves are available with either single-speed or dual-speed
hot-swappable blowers. When using 7200RPM disks, dual-speed blowers are
required - these should have a "BA-35X-MD 2X" label on them. If a blower
fails, it will cause the Shelf OK led on the power supplies (the LED
furtherest from the power connector) to go out and the other blower will
run at full speed if dual-speed blowers are fitted.
The BA350 shelves are available with either single-speed or dual-speed
hot-swappable blowers. When using 7200RPM disks, dual-speed blowers are
required - these should have a "BA-35X-MD 2X" label on them. If a blower
fails, it will cause the Shelf OK led on the power supplies (the LED
furtherest from the power connector) to go out and the other blower will
run at full speed if dual-speed blowers are fitted.
DEC advices to not run the shelf for more than 1 minute with a blower removed or more than 100 hours with a failed blower to prevent overheating. To maintain proper airflow any empty slots in the front of the shelf should have blanks installed. Pedestal units should have foam blocks installed in the gap in the top and under the base to prevent hot exhaust air from the blowers being recirculated.
Installing and Removing StorageWorks Building Blocks from a Pedestal
You'll quickly notice that opening the door on a pedestal unit such as the ones pictured above isn't sufficient — You've got to remove the entire bezel. Depending on the exact model, this may require unlocking it with a key, or you may be able to just push down two clips at the bottom of the bezel. The only purpose the door seems to serve is to provide access to any removable media devices (tape and CD-ROM drives).
SCSI IDs
The StorageWorks Shelf assigns SCSI IDs from top to bottom or from right (where the SCSI connectors are) to left starting from 0. So device in the top/right slot gets SCSI ID 0, and the device in the bottom/left slot gets SCSI ID 6. To prevent conflicts, the SCSI Controller must be assigned SCSI ID 7.
If redundant SCSI controllers are to be used, then the second SCSI controller should be assigned SCSI ID 6 and the 6th slot should either have a redundant PSU or a blank installed.
Split Bus
You can optionally configure the BA350 as two separate SCSI buses (one on each SCSI connector with the shelf providing termination). The left/top SCSI connector gets Slots 0, 2 and 4, and the right/bottom SCSI connector gets slots 1, 3, 5 and 6.
To switch between one or two SCSI buses, turn off the shelf and remove both blowers. For a single bus, put the jumper board (BA35X-MC) in the connector behind slot 5, and the terminator board (BA35X-MB) in the connector behind slot 1. To configure for split bus, do the reverse.
It's also possible to configure two shelves such that they can share a single SCSI bus. Probably the only reason you'd want to do this is if you were installing one or more 5.25" devices which occupy three slots but only consume one SCSI ID. If you put a tape drive across slots 0, 1, and 2 the tape drive would use SCSI ID 1. In the second shelf you would put a blank in slot 1, and you could then put drives in slots 0 and 2. If you want to configure shelves for this sort of setup, the details are in EK-350SA-UG
Documentation
- EK-350SA-UG.001 — BA350-SA Modular Storage Shelf User's Guide (this should also apply to BA350-SB which is a direct replacement for BA350-SA)
- EK-350KF-UG.A01 — BA350-K Series (8-Bit) Deskside Expansion Pedestals Users Guide
- EK-SMCPA-UG.C01 — Expansion Storage Pedestal User's Guide - older manual covering the same content as above?
- EK-SMBKU-PN.A01 — Two-Speed Blower Upgrade Kit Product Notes
- EK-350SV-UG.B01 — BA35X-VA Vertical Mounting Kit Users Guide
- EK-35XRK-IG.B01 — Installing a BA35X RETMA Shelf Mounting Kit