Using Windows for Workgroups with Client32 for DOS/Windows
This page covers how to use Windows Networking in Windows for Workgroups 3.11 with Client32. The instructions here are derived from TID 2910293. The information on this page does not apply to Windows for Workgroups 3.1 or the Microsoft SMB/LANMAN client for DOS.
How you do this depends on whether you are using 32bit or 16bit ODI LAN drivers. Novell recommended using 16bit LAN drivers when running Windows for Workgroups networking because talking to the 32bit protected mode ODI LAN drivers from 32bit protected mode windows via 16bit real mode shims can introduce stability and performance issues. So if you have performance or stability problems and you're using 32bit ODI drivers, try using 16bit ones instead.
As an added benefit, setting up Windows Networking using 16bit ODI drivers is easier as Windows knows what they are (Client32 and its 32bit ODI drivers weren't introduced until after Windows 95 came out).
I've not tried installing Microsofts 32bit TCP/IP stack in this configuration. It seems like it ought to work but Novell doesn't include it in their list of supported protocols under Windows for Workgroups. This might, however, just be because it was an add-on and Client32 already provides a TCP/IP stack (if you choose to install it).
At the end of this you should have both
- Access to the NetWare Network via Client32
- Access to other Windows PCs via Windows Networking/SMB using the NetBEUI or IPX transport protocols
Contents
Process for 32bit ODI LAN Drivers
To start with, install Windows for Workgroups v3.11 with no networking enabled. Then install Client32 normally with windows support, etc, enabled.
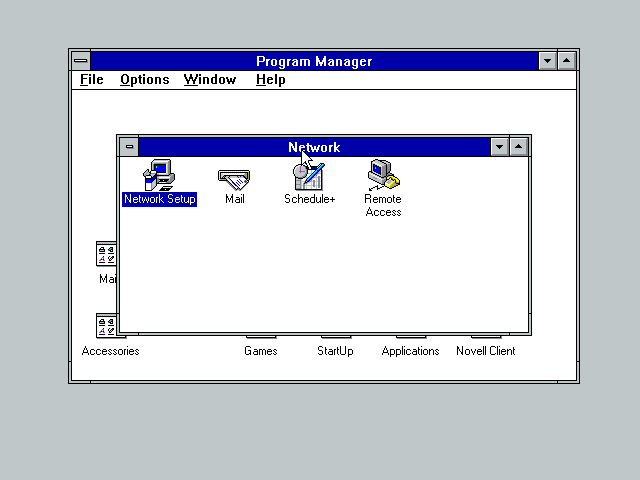
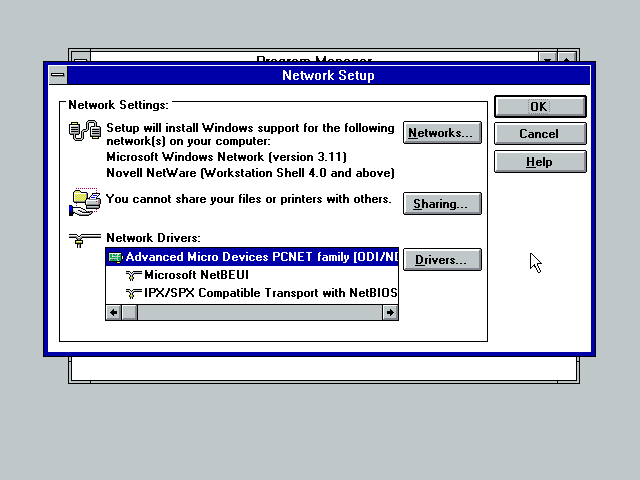
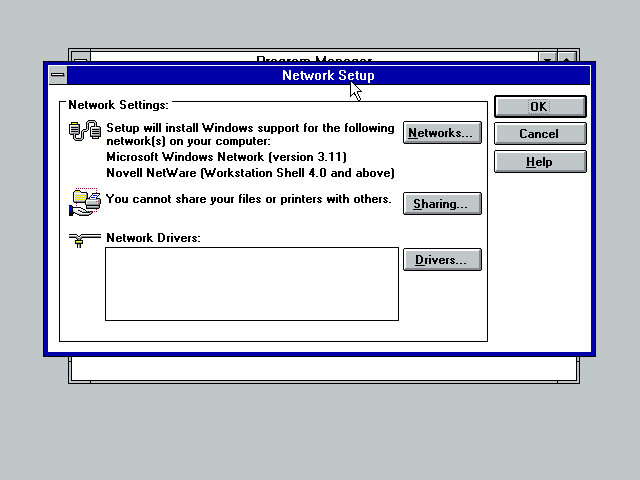
From Windows, open Network Setup in the Network program group:
Click on the Networks button or press Alt+N
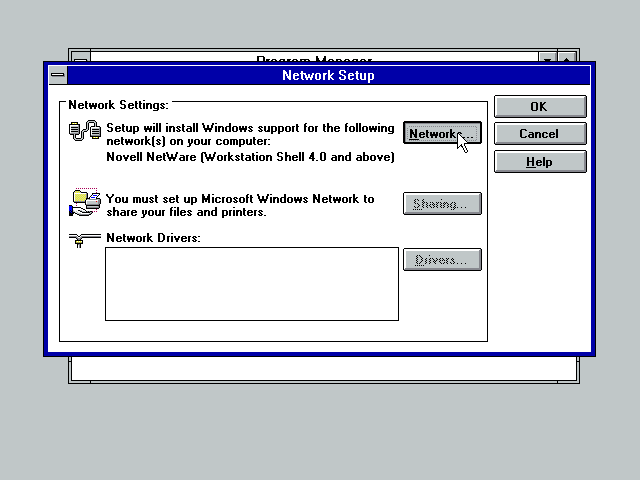
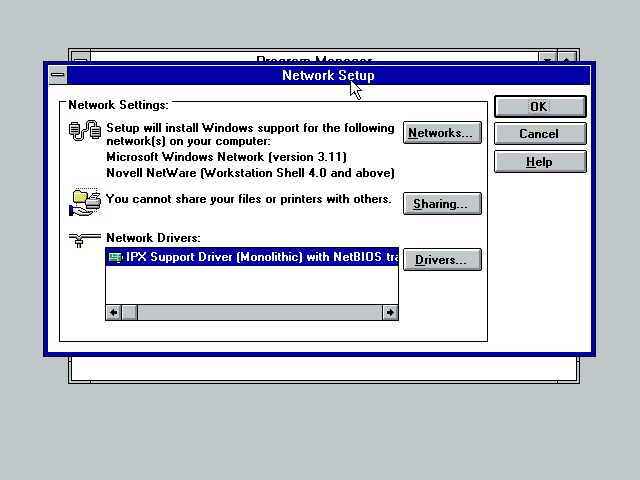
At this stage Windows should be configured only for Novell NetWare (Workstation Shell 4.0 and above).
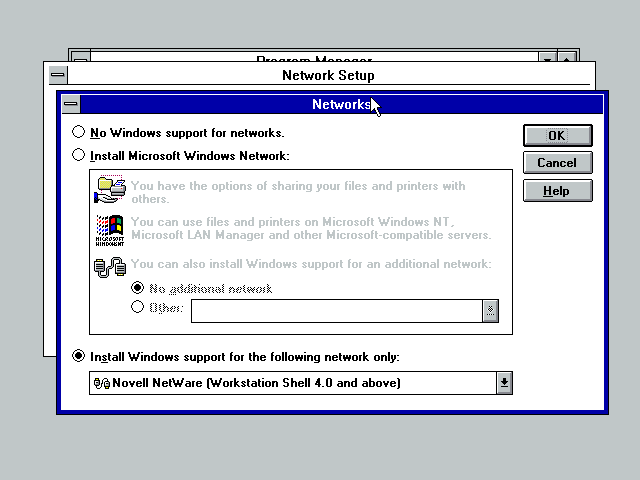
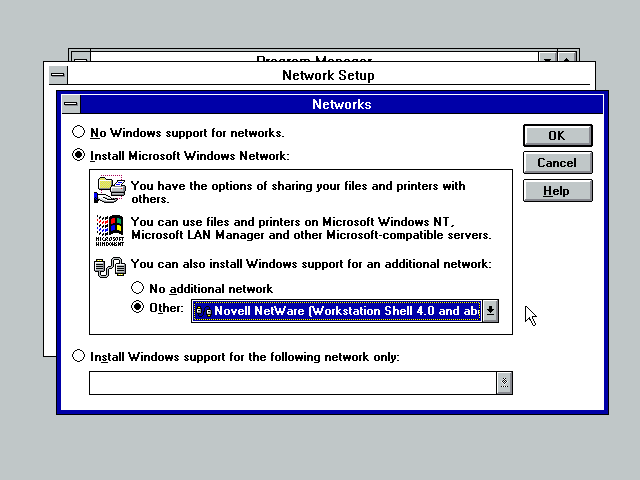
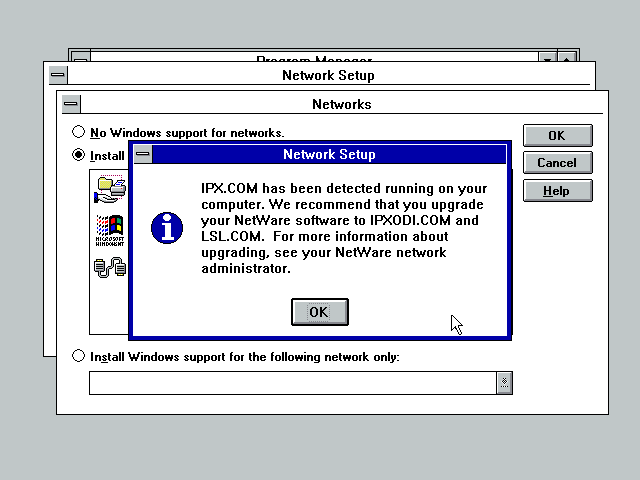
Select the Install Microsoft Windows Network radio button. Then choose to install Windows support for an additional network (the Other radio button) and select Novell NetWare (Workstation Shell 4.0 and above) from the drop-down list. When done click OK.
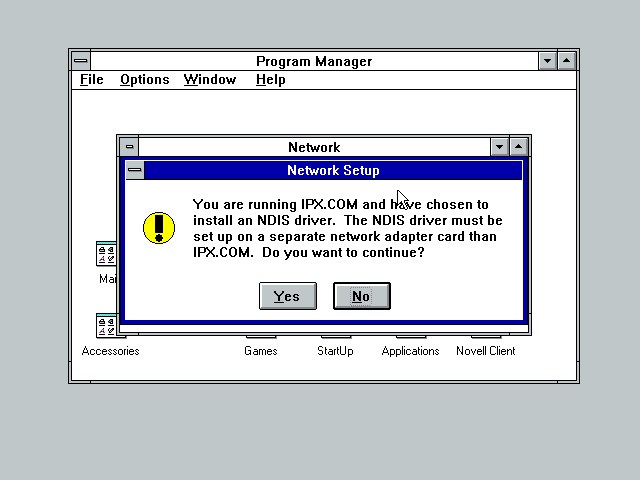
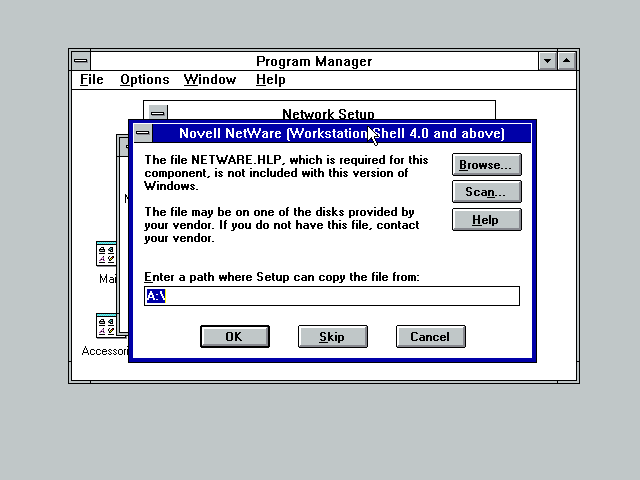
I got this warning. It probably doesn't matter.
Back at the Network Setup window. Optionally you can now click on the Sharing button to enable shared folders and printers. When done adjusting any sharing options, click the Drivers button.
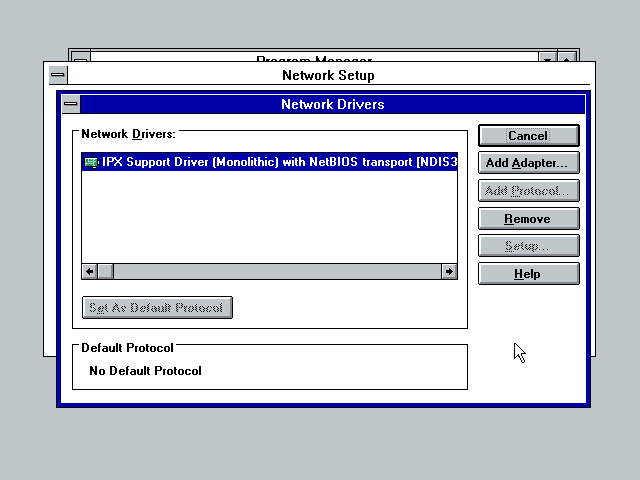
If you see IPX Support Driver (Monolithic) like in the screenshot below, click the Remove button to remove it and confirm when asked if you're sure.
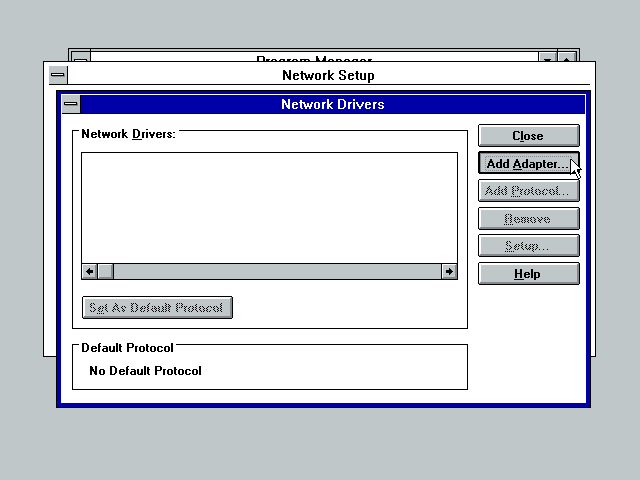
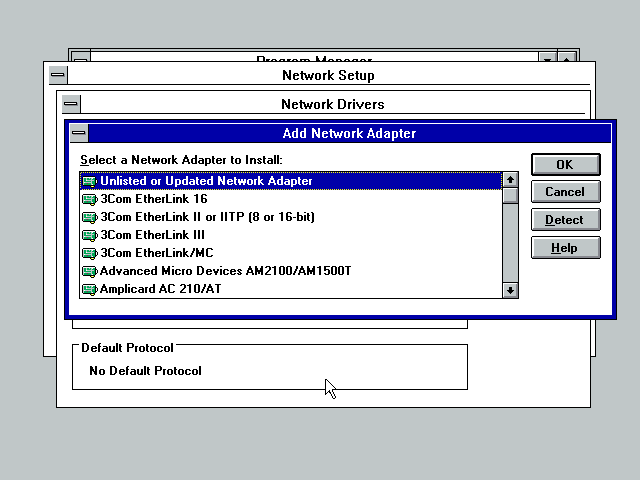
Click Add Adapter
Select the appropriate driver for your network card. I'm using VirtualBox so I have to supply my own AMD PCnet driver.
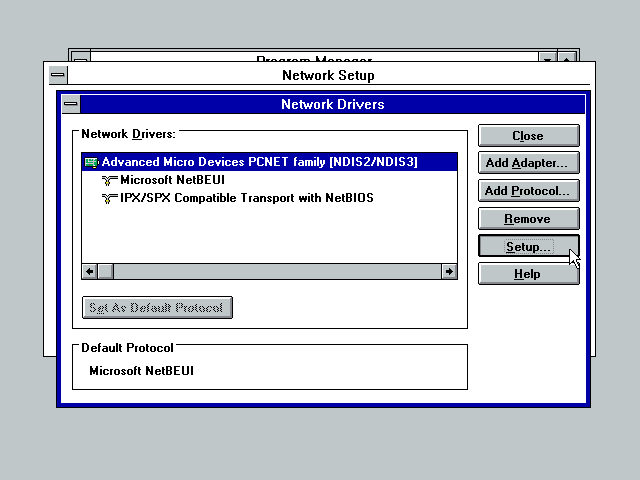
Once the driver is installed, select it from the list and click on the Setup button.
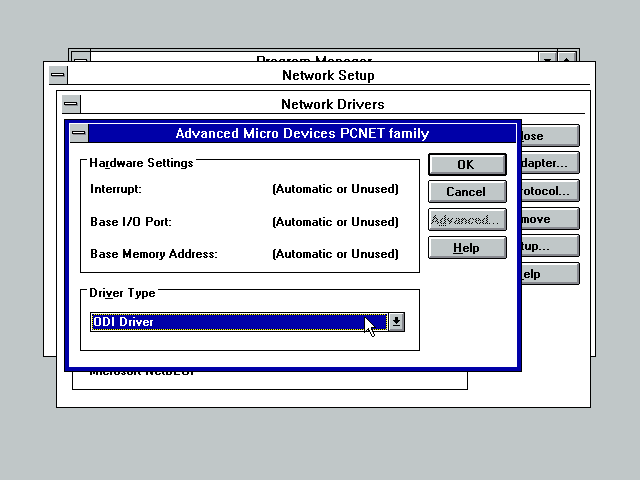
From the Driver Type drop-down list, select ODI Driver and click OK.
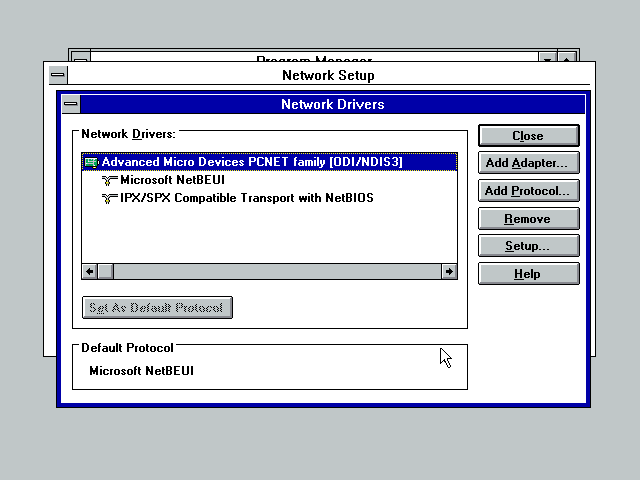
You can now install any additional protocols (the only supported ones for Client32 are NetBEUI, IPX/SPX Compatible Transport, and IPX/SPX Compatible Transport with netBIOS) and change your default protocol if you don't want to use NetBEUI. When done, click Close.
Then click OK
I got this and clicked Yes.
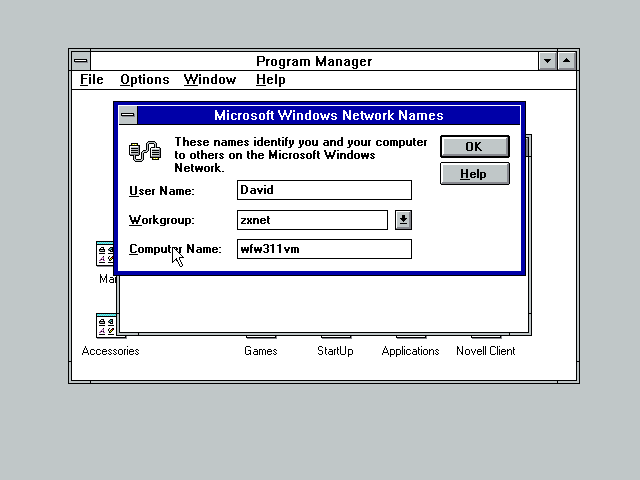
Set network options.
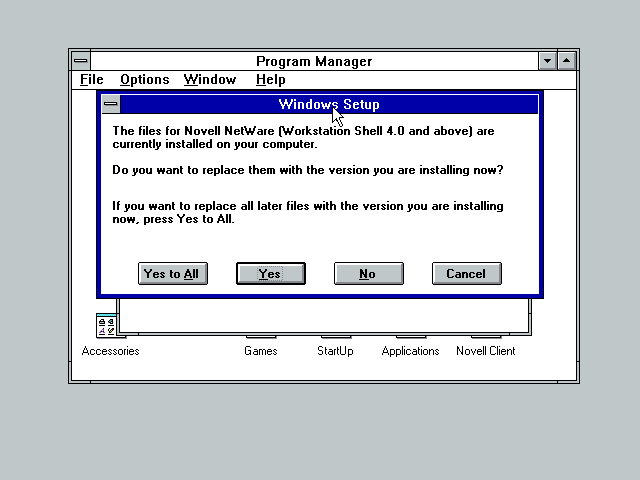
When prompted to overwrite existing files, choose No - Client32 has newer versions of these files.
Another error! Its complaining about a few missing files - perhaps Client32 v2.71 no longer requires them. I just skipped them - I expect Novell knows which files their client needs and Windows doesn't need to be replacing anything it thinks is missing.
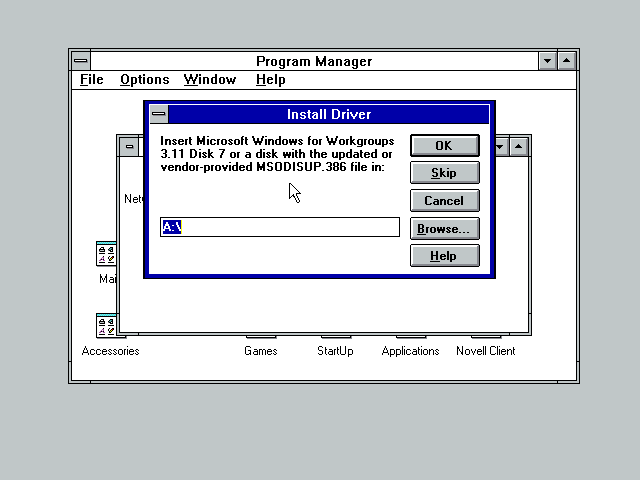
You'll then need to feed windows disks 7 and 8 so it can install the Windows Network bits.
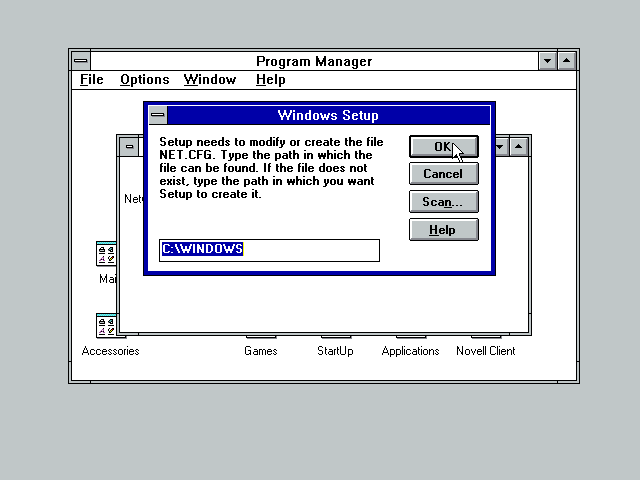
Windows then wants to know where NET.CFG lives. By default this is in C:\NOVELL\CLIENT32
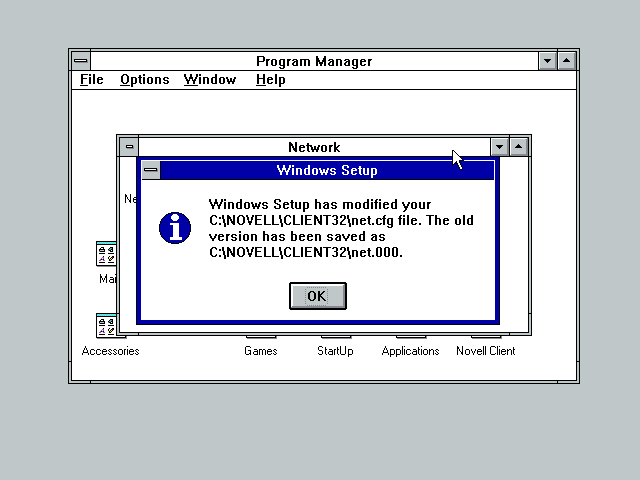
Windows tells us about all the files its modified then asks if we want to reboot. Don't reboot, just click Continue.
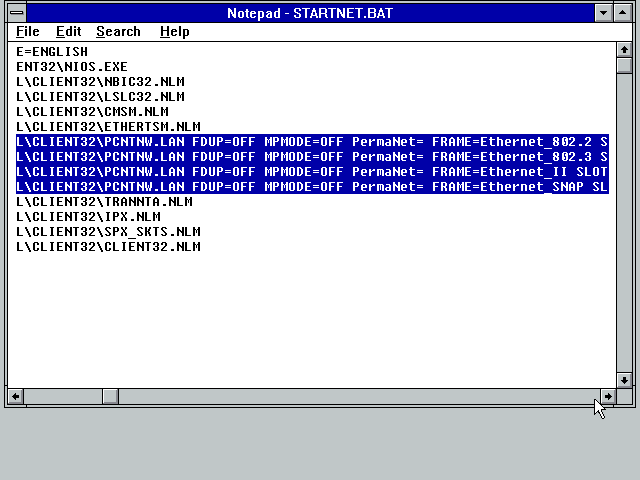
Edit C:\NOVELL\CLIENT32\STARTNET.BAT and make sure your network driver is loaded four times - once for each frame type
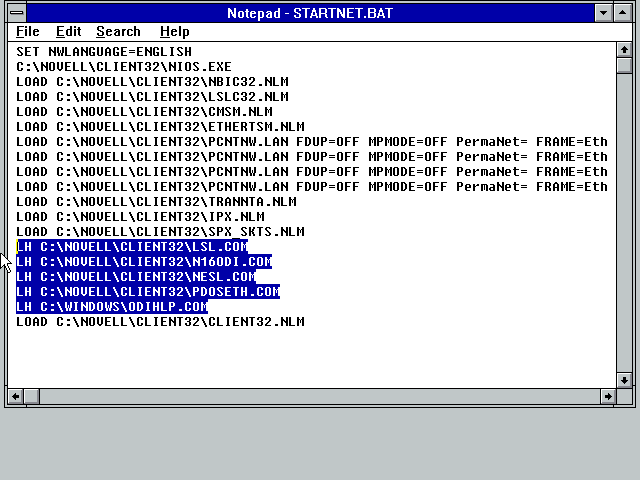
Then add the following lines before CLIENT32.NLM:
   LH C:\NOVELL\CLIENT32\LSL.COM
    C:\NOVELL\CLIENT32\LSL.COM
    C:\NOVELL\CLIENT32\N16ODI.COM
    C:\NOVELL\CLIENT32\NESL.COM
    C:\NOVELL\CLIENT32\PDOSETH.COM
    C:\WINDOWS\ODIHLP.EXE
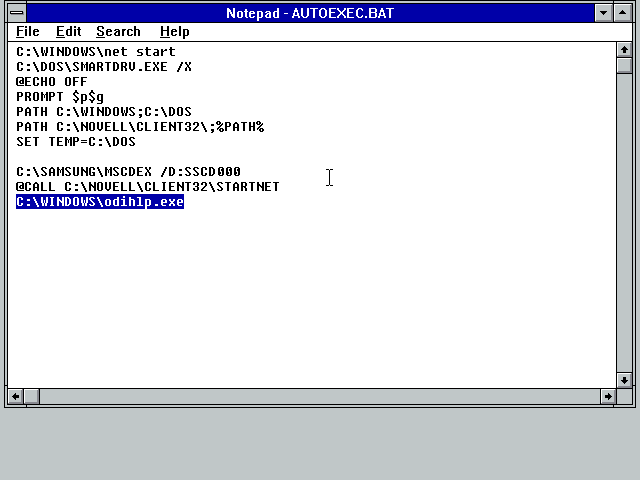
Edit C:\autoexec.bat and remove the line C:\WINDOWS\odihlp.exe
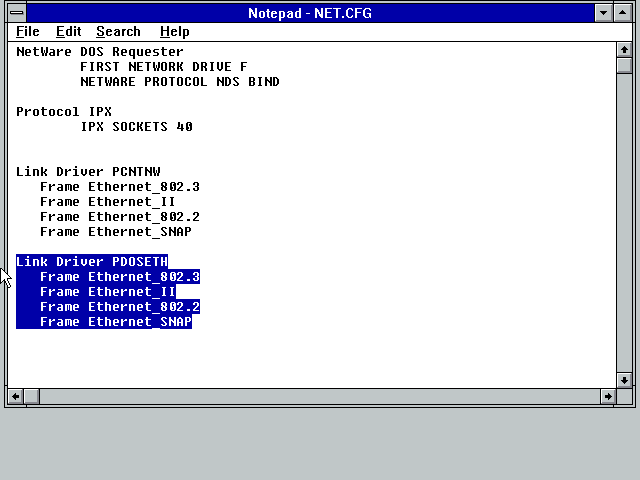
Edit C:\NOVELL\CLIENT32\NET.CFG and add the following to the end of the file after a blank line:
   Link Driver PDOSETH
        Frame Ethernet_802.3
        Frame Ethernet_II
        Frame Ethernet_802.2
        Frame Ethernet_SNAP
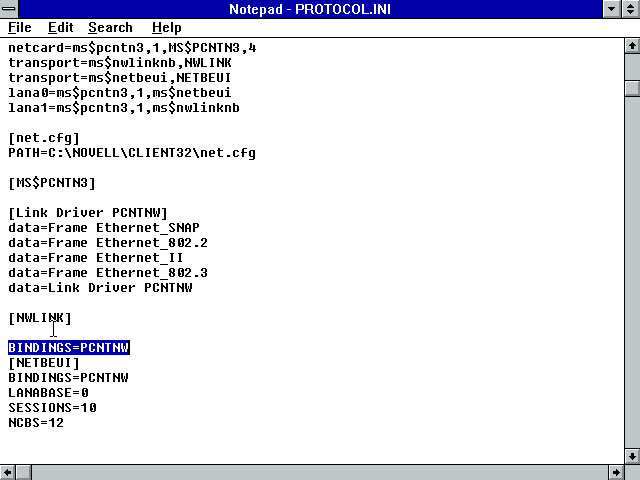
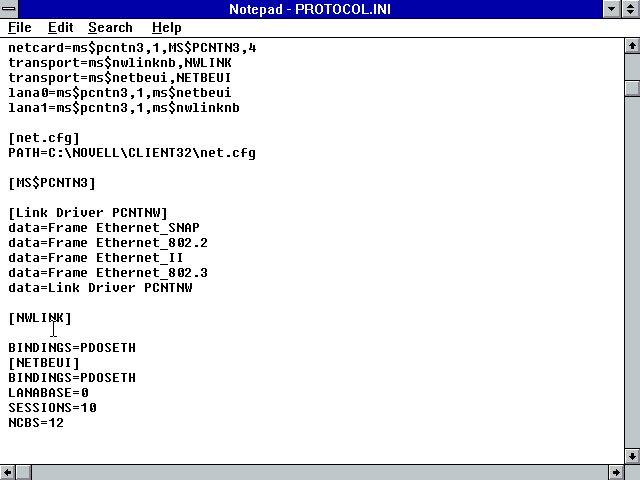
Edit C:\WINDOWS\PROTOCOL.INI and change any BINDINGS lines to PDOSETH
Save and close the file then exit windows and reboot the computer.
You should now be able to use Windows Networking normally. If you have the NetWare login screen set to show on startup it will appear before the Windows Network login screen.
Process for 16bit ODI LAN Drivers
To start with, install Windows for Workgroups v3.11 with no networking enabled. Then install Client32 normally with windows support, etc, enabled. Make sure you install using 16bit LAN drivers.
From Windows, open Network Setup in the Network program group:
Click on the Networks button or press Alt+N
At this stage Windows should be configured only for Novell NetWare (Workstation Shell 4.0 and above).
Select the Install Microsoft Windows Network radio button. Then choose to install Windows support for an additional network (the Other radio button) and select Novell NetWare (Workstation Shell 4.0 and above) from the drop-down list. When done click OK.
Back at the Network Setup window. Optionally you can now click on the Sharing button to enable shared folders and printers. When done adjusting any sharing options, click the Drivers button.
Click Add Adapter
Select the appropriate driver for your network card. I'm using VirtualBox so I have to supply my own AMD PCnet driver.
Once the driver is installed, select it from the list and click on the Setup button.
From the Driver Type drop-down list, select ODI Driver and click OK.
You can now install any additional protocols (the only supported ones for Client32 are NetBEUI, IPX/SPX Compatible Transport, and IPX/SPX Compatible Transport with netBIOS) and change your default protocol if you don't want to use NetBEUI. When done, click Close.
Then click OK
Set network options.
When prompted to overwrite existing files, choose No - Client32 has newer versions of these files.
An error! Its complaining about a few missing files - perhaps Client32 v2.71 no longer requires them. I just skipped them - I expect Novell knows which files their client needs and Windows doesn't need to be replacing anything it thinks is missing.
You'll then need to feed windows disks 7 and 8 so it can install the Windows Network bits.
Windows tells us about all the files its modified then asks if we want to reboot. Don't reboot, just click Continue.
Edit C:\autoexec.bat and remove the line C:\WINDOWS\odihlp.exe
Edit C:\NOVELL\CLIENT32\STARTNET.BAT and add the line C:\WINDOWS\odihlp.exe after the line that loads LSLC32.NLM.
Save and close all files, exit windows and reboot the computer. When you start windows again you should be able to use Windows Networking normally. If you have the NetWare login screen set to show on startup it will appear before the Windows Network login screen.
Notes
- If you later change network settings you'll need to edit autoexec.bat and remove ODIHLP.EXE again
- You may get errors if 32bit File Access is enabled (under the Enhanced control panel, Virtual Memory window)
- This April 1995 Application Note gives more information on this configuration
Links
- TID 2910293: C32DW and 16bit Protocol/Drivers, or WFW (last modified: 9-JAN-1998)
- A collection of DOS Network Shims
Disclaimer & Comments
I'm not a netware expert, don't have any of those fancy novell certifications and have never administred a netware network; I've just played with it at home occasionally since 2004 or so. Email me if you've got any suggestions or corrections for this page or any extra information you think is worth including here. My address is david at this websites domain name (without the www bit of course).