Installing NetWare 4.11 in Linux-KVM
This is the basic procedure I used to get Netware 4.11 (IntranetWare) up and running in Linux-KVM. Its documented with an annoying large number of often fairly obvious and unnecessary screenshots to leave no doubt about whats going on.
I've made four attempts so far at getting this to work:
- Tried installing using FreeDOS largely with the default VM settings: The netware installer doesn't work properly
- Tried installing with MS-DOS largely with the default VM settings: The first stage of the installer worked fine but when it boots into NetWare to continue the install it would crash. Eventually figured out the Spice display type was the cause
- Tried installing using the RTL8139 NIC. The NetWare driver doesn't work with the release CD and with SupportPack 8 installed the driver kills the VM (KVM emulation error) when it starts
- The attempt documented here. This time everything worked!
This install is being done on Debian 10.10 (buster). uname gives Linux titan 4.19.0-16-amd64 #1 SMP Debian 4.19.181-1 (2021-03-19) x86_64 GNU/Linux. Libvirt-daemon is verison 5.0. I'm managing it with virt-manager 2.2.1 running under the windows subsystem for linux (v2) connecting to the server via SSH.
Contents
Tools
Things you'll need to complete this:
- A linux server with KVM setup
- Knowledge of how to hook up a VM directly to your network (bridge)
- A copy of IntraNetWare 4.11 with a valid license disk
- A licensed copy of MS-DOS 6.22
I've tried FreeDOS but had a lot of trouble getting the installer to run at all let alone actually complete
You may also find the manuals useful. The manuals are of course all on the Documentation CD that comes with NetWare 4.11 but that won't work on current versions of Windows. The PDFs on this page will work just fine though!
Virtual Machine Configuration
This is the VM I'm creating. You can tweak these settings if necessary.
- Created with virt-manager
- 64MB RAM
- 2 CPUs
- IDE disk, 10GB
- IDE CD-ROM drive
- Floppy Drive
- AMD pcnet NIC
- Display type VNC (Spice does not work)
- Sound hardware removed
- Video type VGA
Quick Summary
Because the number of screenshots is a little absurd, here is a quick rundown:
- Create a VM
- Use the VNC display type, not spice
- Pick a NIC thats got a suitable NetWare driver available. pcnet seems to be a good choice.
- Install MS-DOS 6.22.
- DR-DOS 6/Novell DOS 7 will probably work too (given they were owned by Novell at the time).
- FreeDOS does not seem to work (installer won't run or won't complete
- If you don't have a copy of MS-DOS 6.22 your license disk might be a DR-DOS boot disk - you can probably use that to format C drive and make it bootable.
- Don't give the DOS the entire disk - just give it a single small partition (100MB is plenty) and leave the rest of the disk unpartitioned.
- You'll need a CD-ROM driver
- Run the netware installer
- If you created a VM with multiple CPUs and you're asked about installing SMP, choose yes
Creating the VM
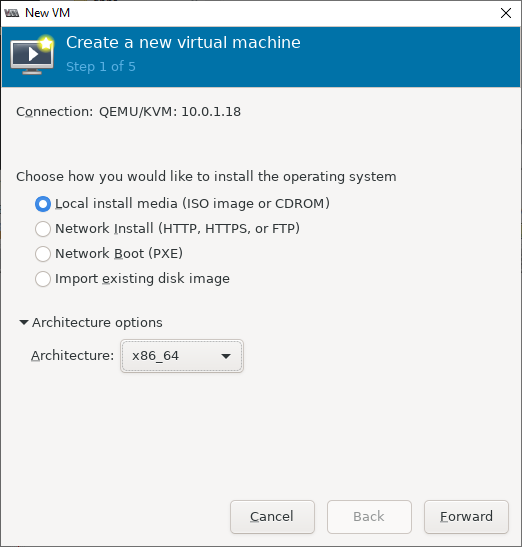
New VM! Choose local install media. x86_64 architecture should be fine (not that
we need 64bit)
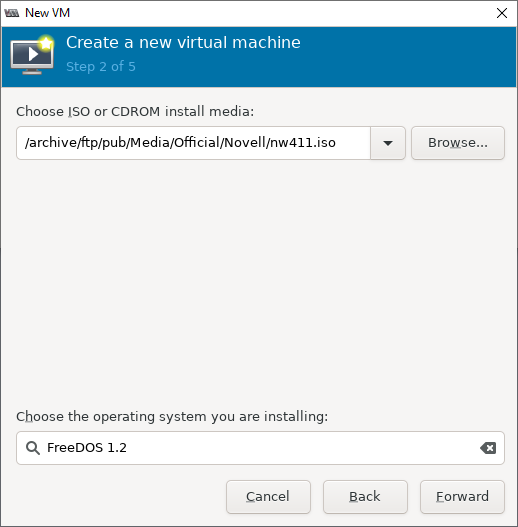
Select the IntraNetWare 4.11 Install CD image. I'm going with FreeDOS 1.2 as the
operating system. No idea if this is correct but I figure NetWare boots with DOS
and FreeDOS is the closest in the option list to MS-DOS.
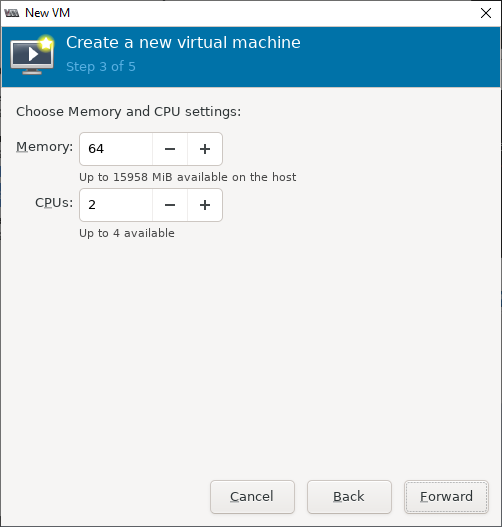
Pick some RAM. NetWare 4.11 supports SMP so you can add multiple CPUs if you want.
Then you get multiple utilisation snakes in monitor.nlm
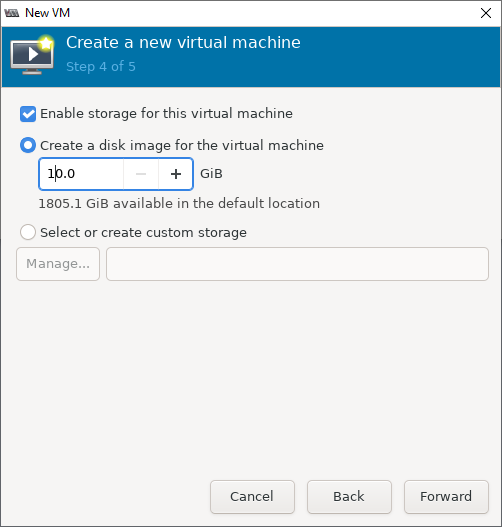
Give the VM some disk. 10GB is a lot for 1996 so should be good enough. We can
always give it more disks later (I've no idea what the max for NWFS is)
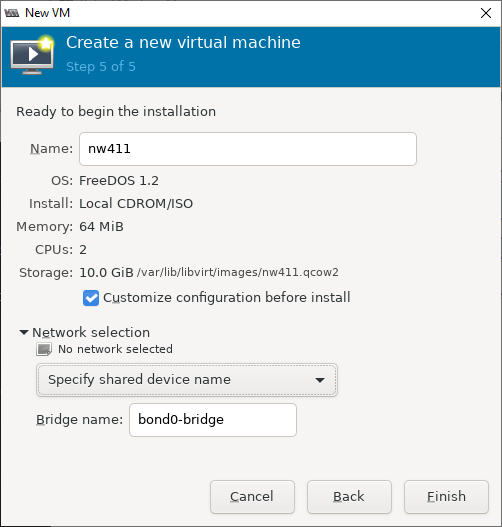
Give it a name. No spaces allowed. Also check customise configuration before
install as there are a few more changes to make. You might also want to pick
a network - what you do here is out of scope. I'm assuming you've networked
other VMs before - this VM should be no different. Just don't rely on IP routing
as NetWare uses IPX.
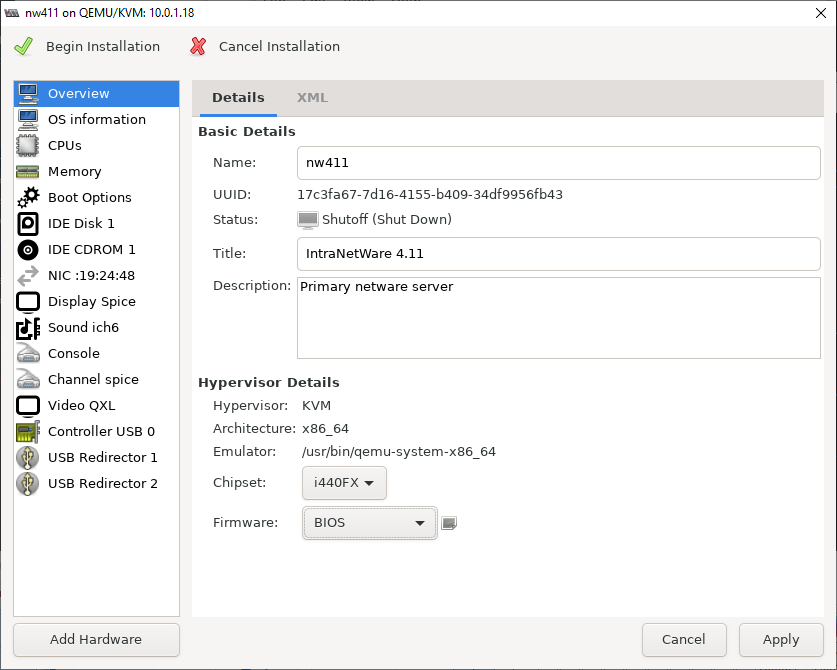
Here you can give it a friendlier display name and description. The default
chipset and firmware are fine. Hit "Apply" to save the changes - you've got to
apply your changes separately for each tab.
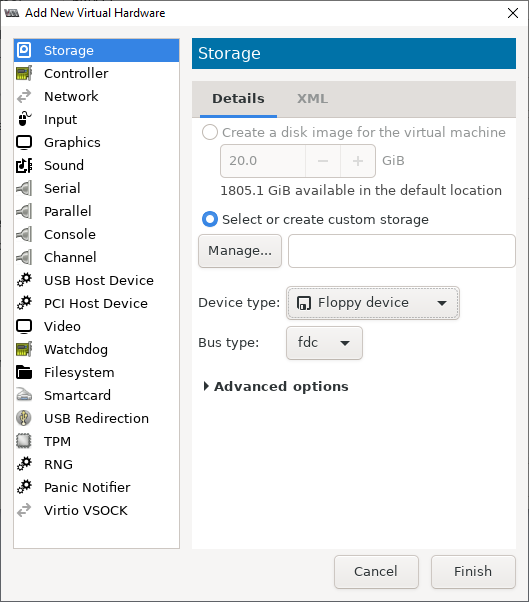
Hit the "Add Hardware" button - we're going to need a floppy drive!
Choose select or create custom storage. You can leave the storage itself blank.
Choose "Floppy device" as the device type, bus "fdc".
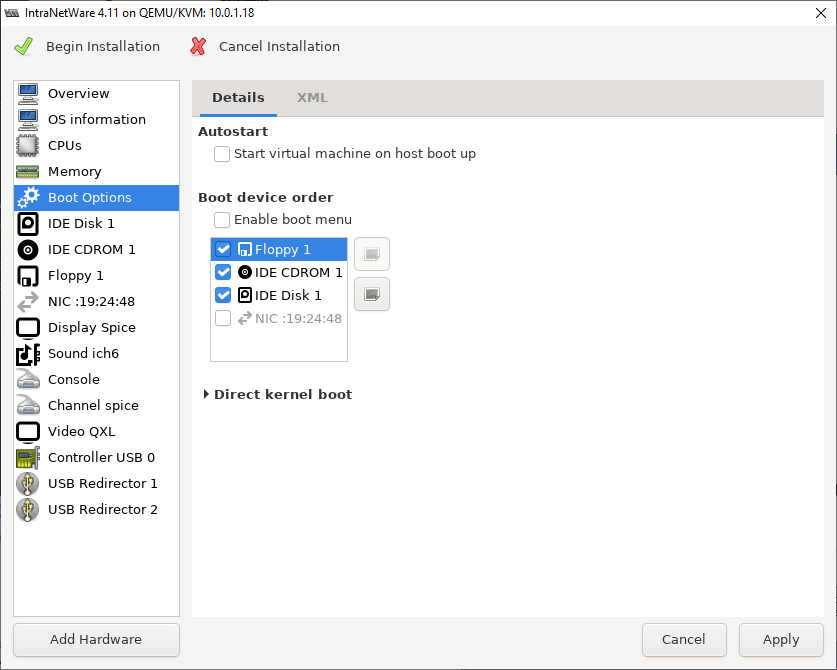
Enable Floppy and CD booting and put them both ahead of booting from the IDE disk.
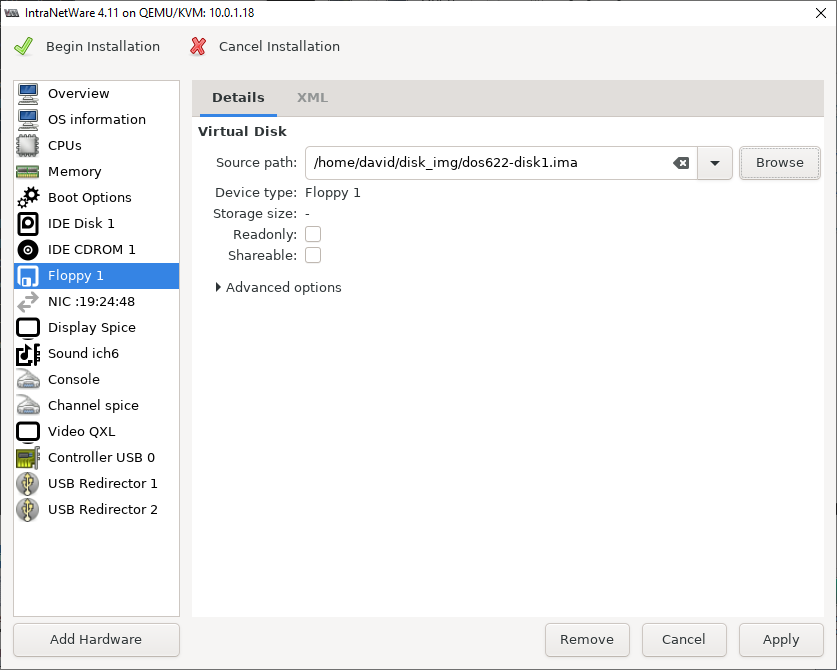
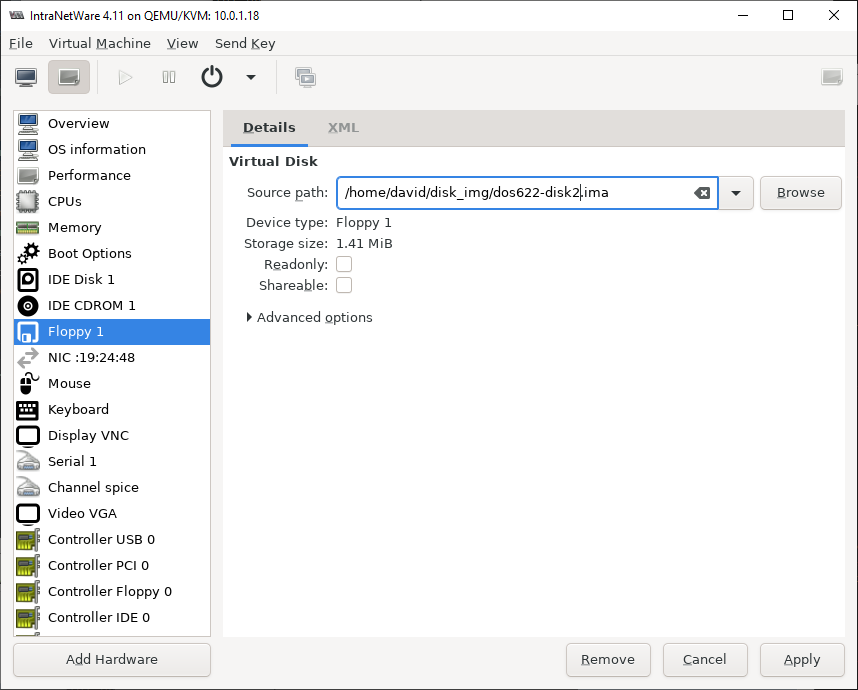
Attach an image of MS-DOS 6.22 Setup Disk 1 to the floppy drive
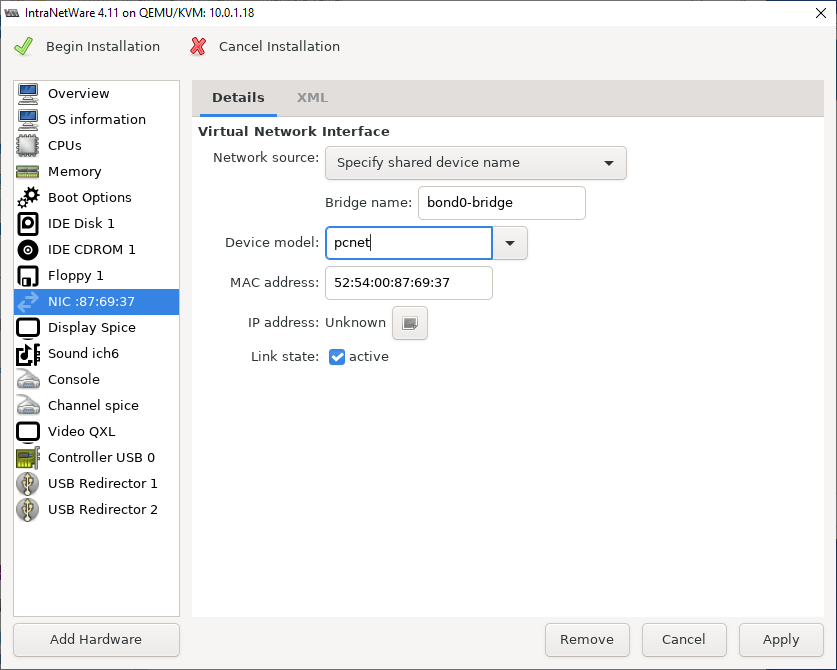
Change the virtual NIC device model. There aren't any NetWare 4 drivers for the
e1000 that I can find. There is a driver for the RTL8139 that shows in the drop-down list for me but I've not managed to get it to work. For NetWare to load the driver you need one of the Support Packs loaded which is a bit of a pain to do without network access and even if you do that the VM crashes when NetWare tries to load the driver.
So we'll just go with pcnet as the driver. It doesn't appear in the drop-down list for me, I had to just type it in. NetWare has a driver for this out-of-the-box which should work fine. If virt-manager doesn't like you typing in pcnet you can get a list of all available device models by SSHing into your server and running qemu-system-i386 -net nic,model=?.
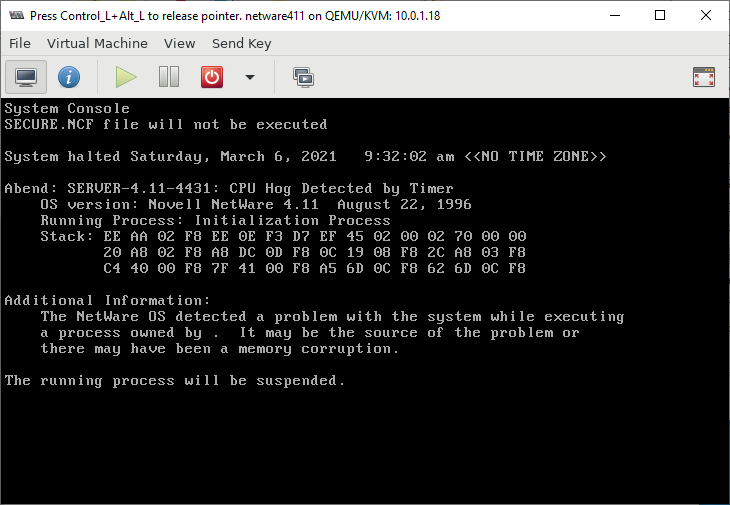
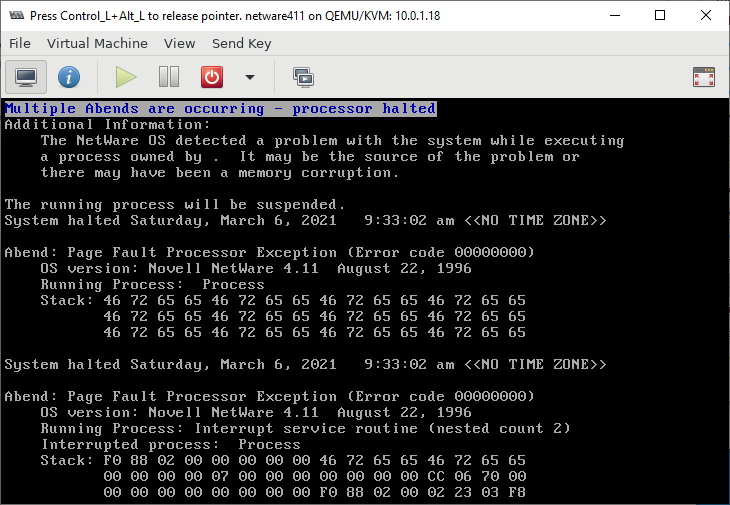
Very Important! The default display type (shown below) is SPICE. This
does *not* work with NetWare for some mysterious reason. NetWare 4.11 crash during
startup with errors like this and this. NetWare 3.12 behaves much the
same.
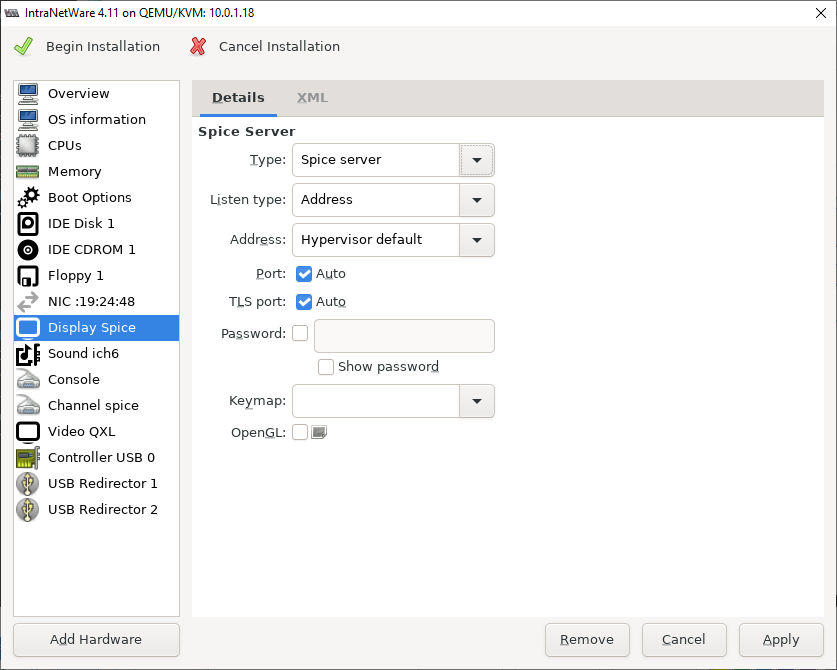
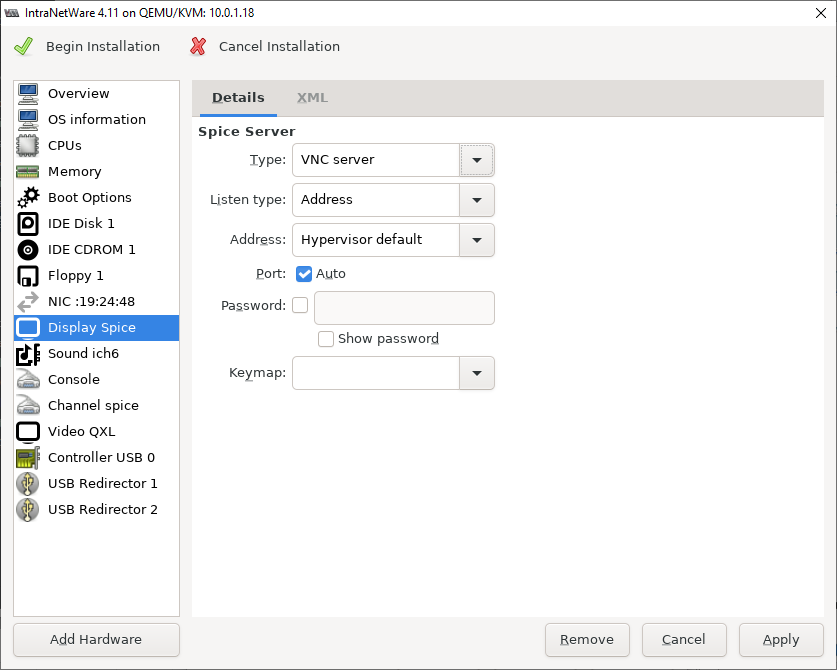
So change the type to VNC. When you hit Apply the tabs name will change from
"Display spice" to "Display VNC".
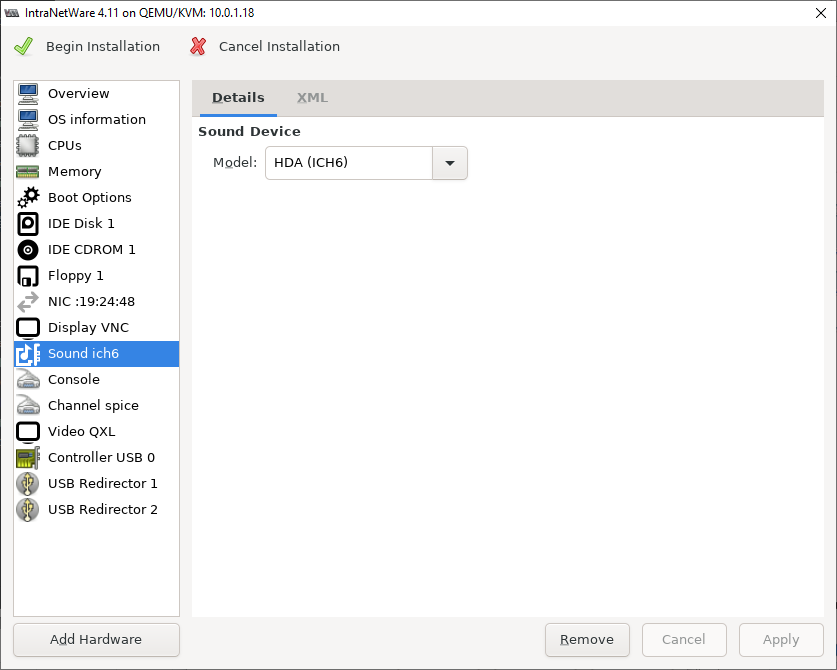
Sound device: Don't need it, NetWare doesn't support High-Definition Audio. Or
audio at all as far as I know. Hit the Remove button.
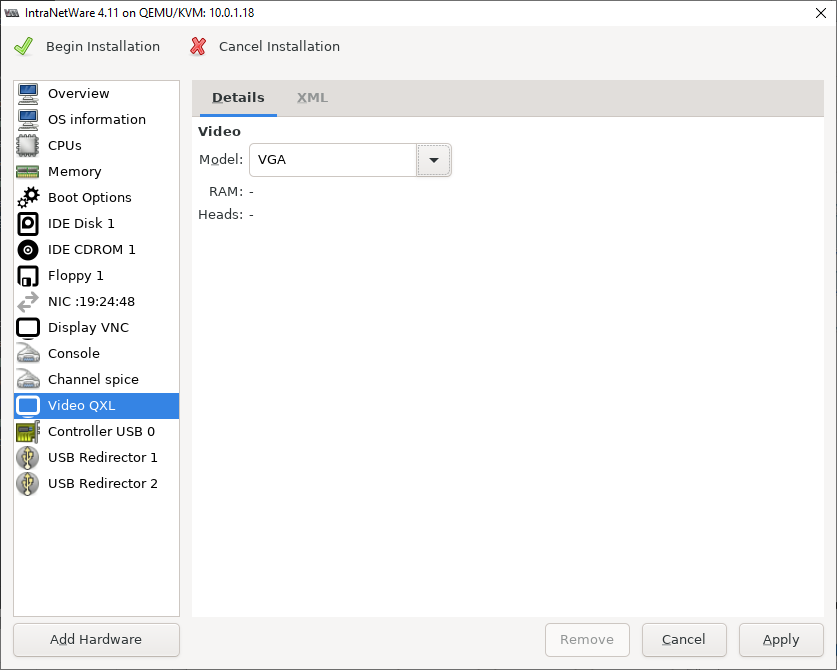
Change the display from QXL to VGA. I don't know if this is strictly required or
not but I know VGA+VNC works.
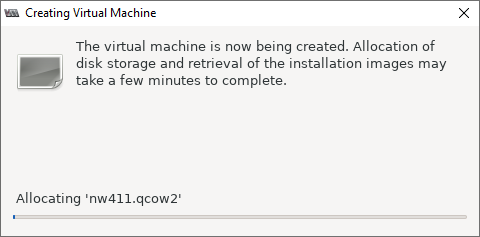
Once you've hit apply, hit the install button to finish creating the VM and boot it!
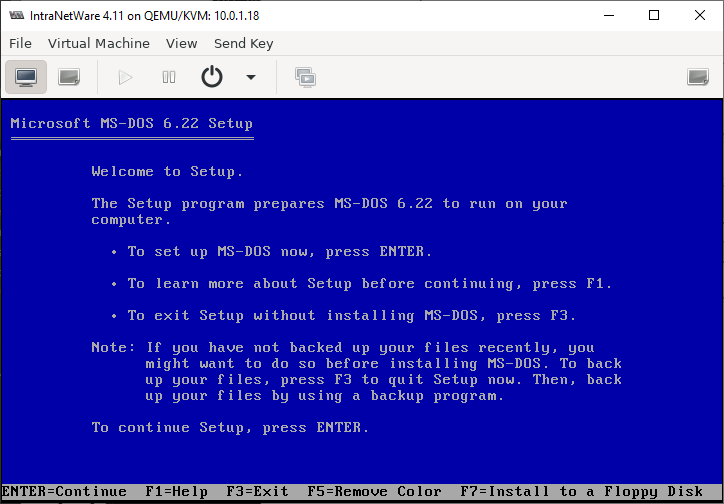
Installing MS-DOS
Now we're installing MS-DOS! Because we previously mounted the DOS setup disk
once created the VM will boot straight into the setup program. We need to do some
disk partitioning before installing netware so just hit F3 to exit for now.
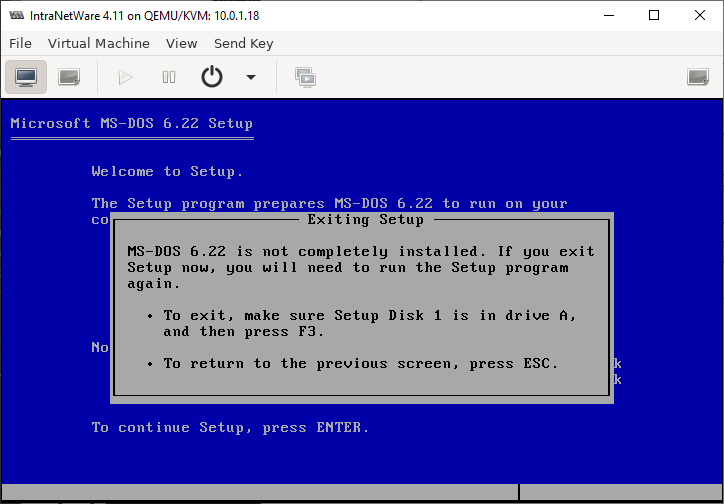
And hit F3 again to confirm
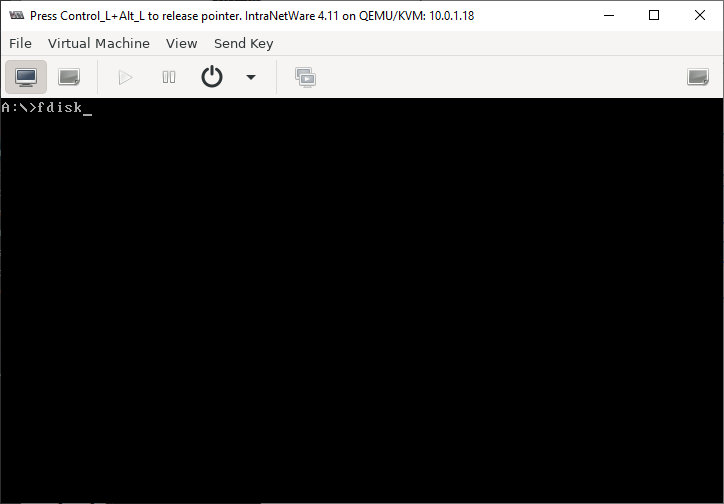
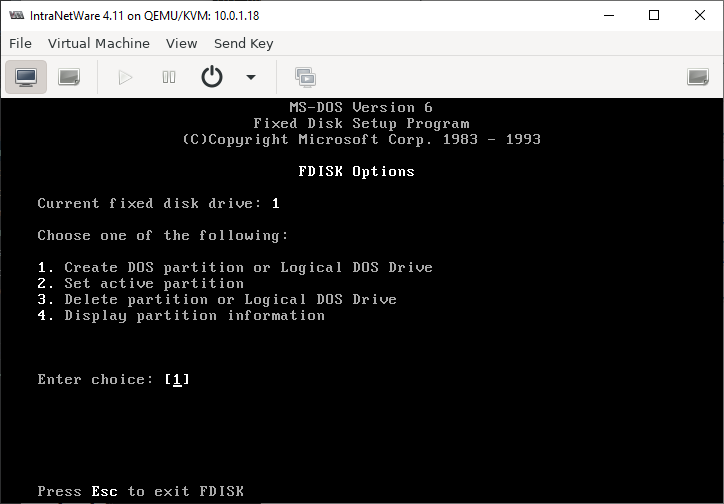
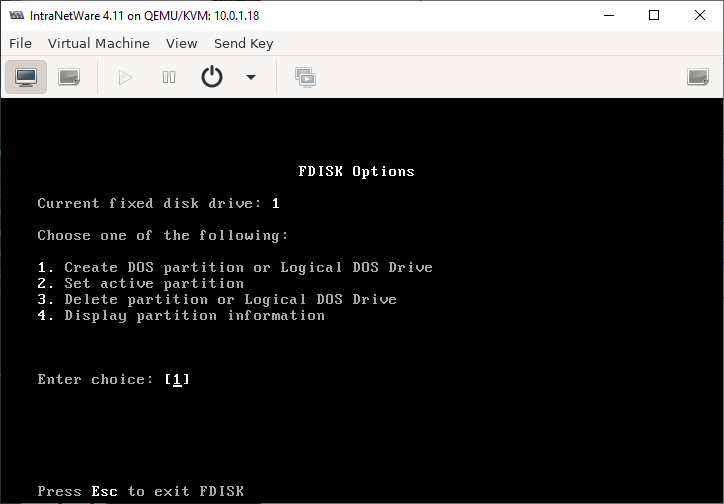
At the DOS prompt, run fdisk: we need to create a partition to install DOS and
the NetWare startup files on
FDisk! Choose option 1 - Create DOS partition or Logical DOS Drive
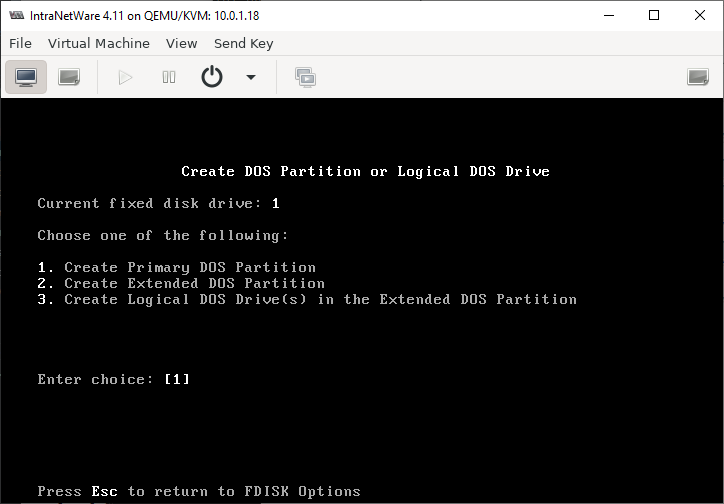
Choose option 1: Create Primary DOS partition
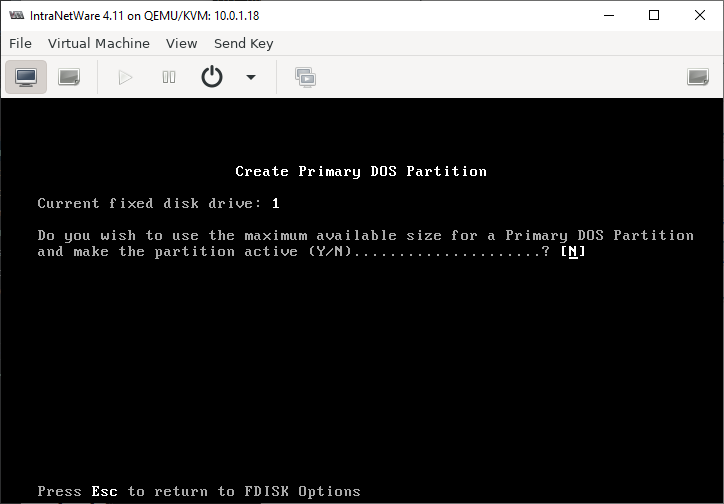
Enter N here: we do NOT want to give the entire drive to DOS. This is because NetWare uses DOS as a boot loader so part of it (the kernel and bits necessary to mount the NWFS SYS: volume) live on the DOS partition.
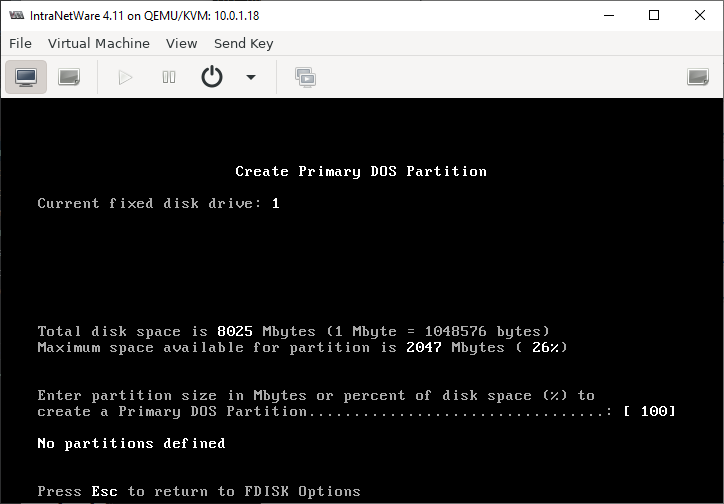
The manual says 15MB ought to be enough
but to make troubleshooting easier go with 15MB plus 1MB for every MB of RAM.
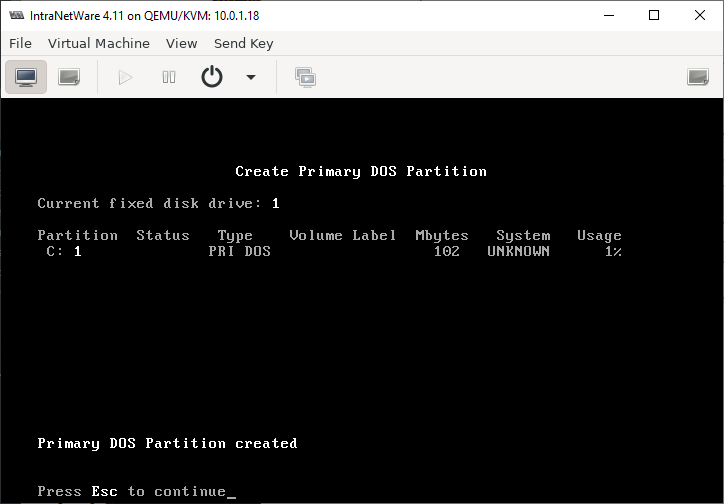
Given disk space is cheap its easiest I'm just going with a nice round 100MB.
Partition created, hit esc to continue
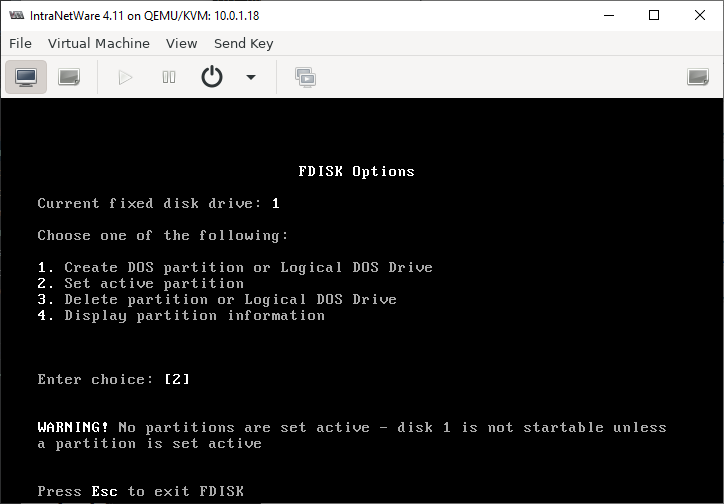
Now choose option 2: set active partition
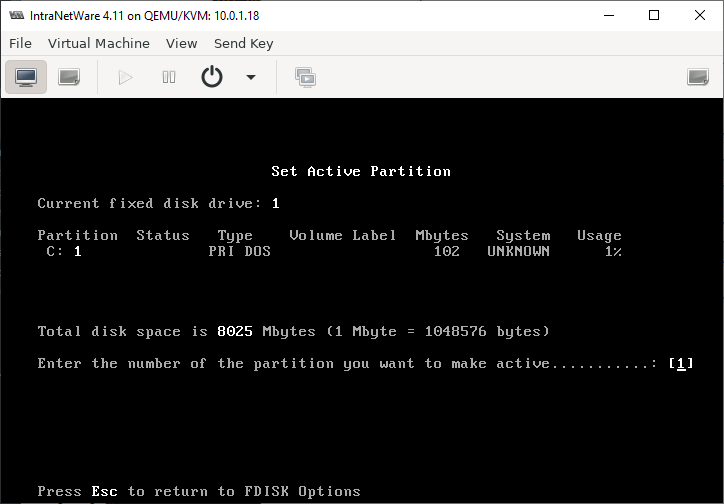
And choose the partition you previously created, partition 1
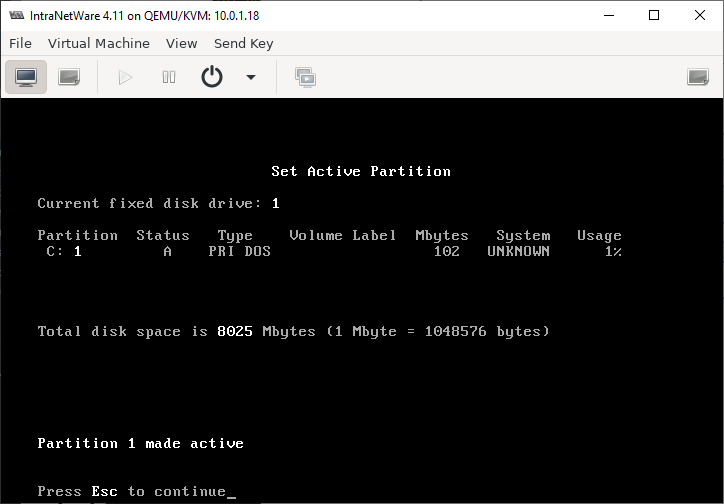
And the partition is now active. Hit Esc to continue
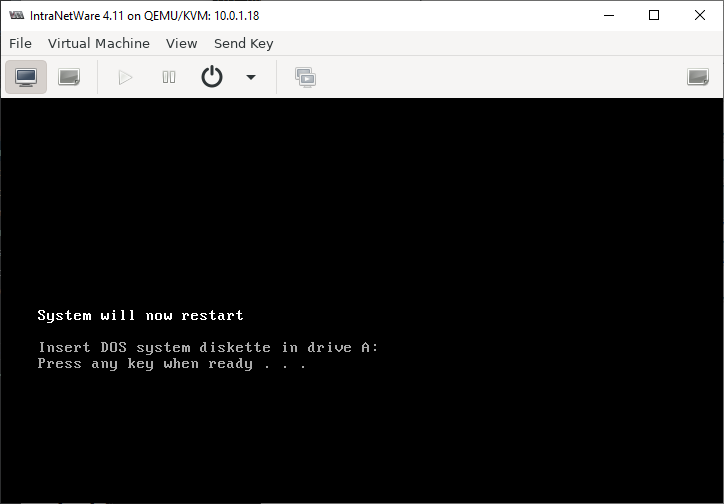
And we're now done with fdisk. Hit esc to exit
And then hit any key to reboot
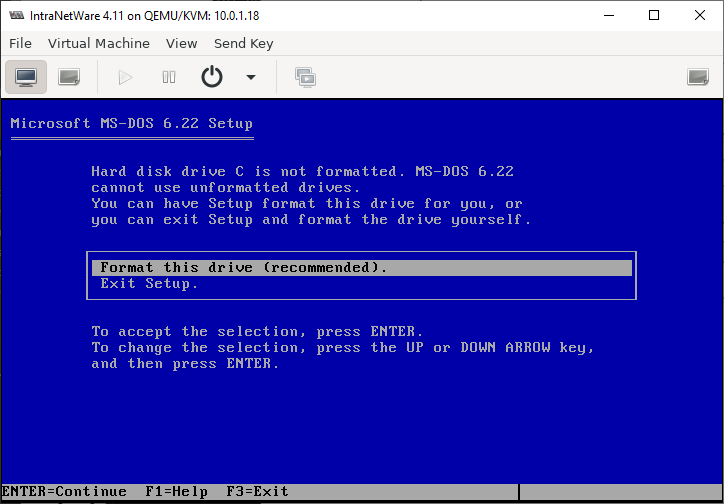
Back in setup! Hit ENTER to continue

Yep, format C drive
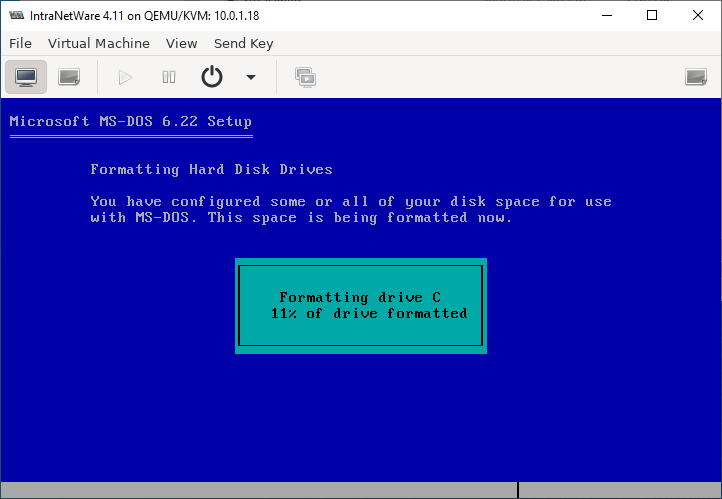
The formatting screen will flash by
And then you get to
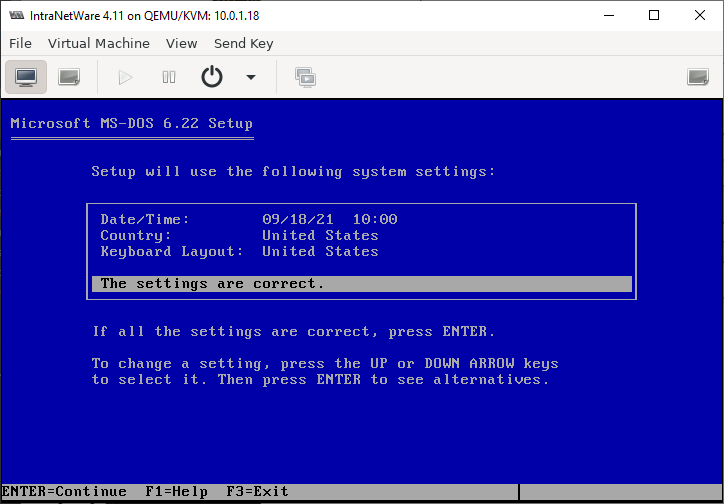
choose your language! These settings look good enough.
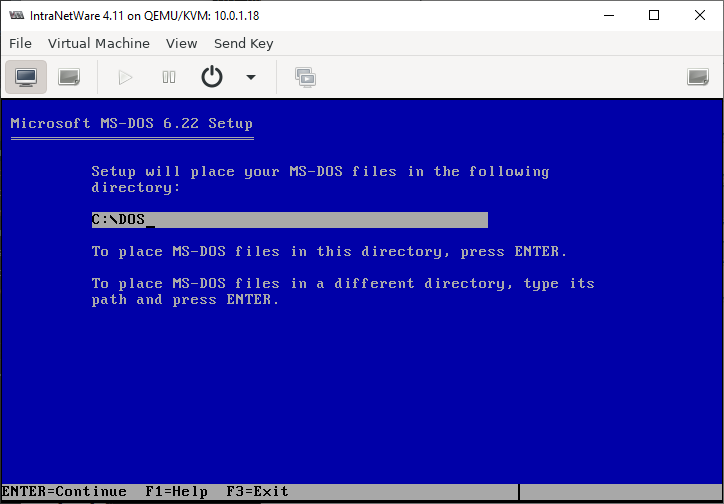
Default location looks fine!
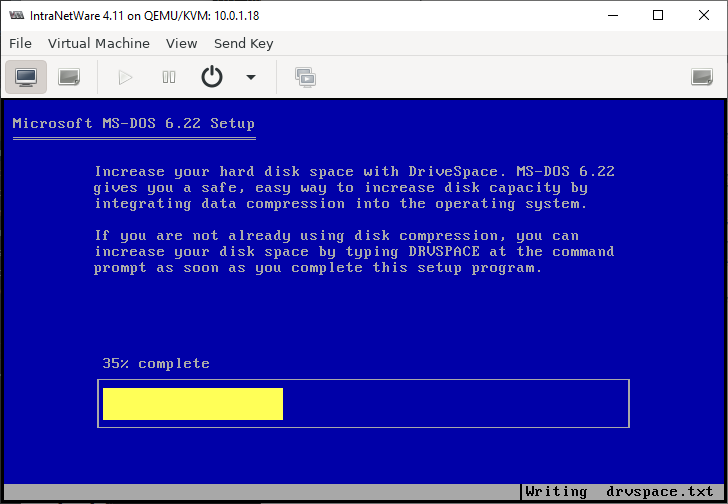
Installing...
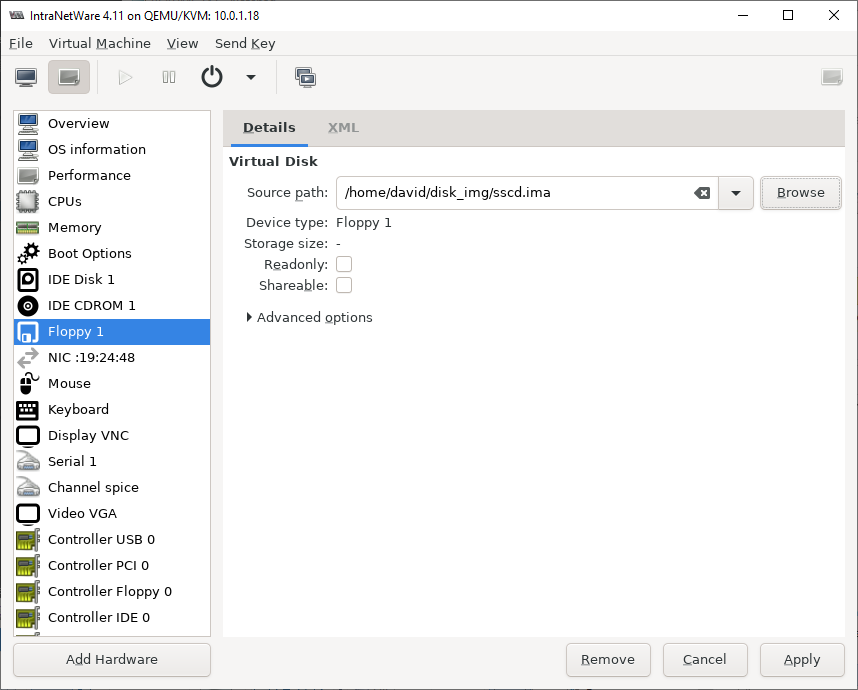
Now we change disk! Hit the "Show virtual hardware details" toolbar button
(second from the left).
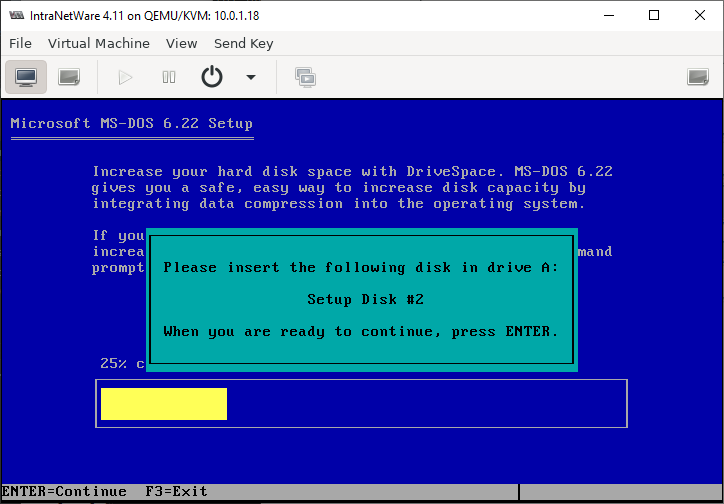
And go to the floppy disk and change the source path to point to the second
MS-DOS 6.22 setup disk. Hit Apply then click on the "Show the graphical console"
button (left most in the toolbar)
Back at the disk prompt screen, hit ENTER to continue
Installing from disk 2...
And now we need disk 3.

Process is the as for disk 2: just pick disk 3 this time.

Then hit ENTER to continue with disk 3
Installing from disk 3...

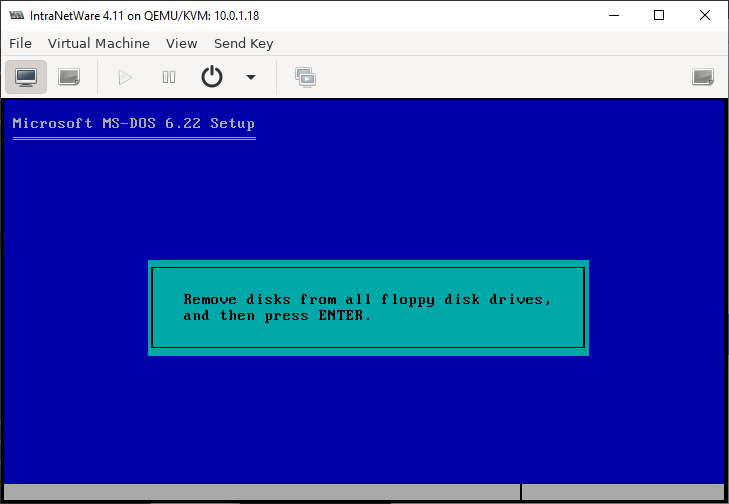
Done installing! Now we've got to remove the virtual floppy disk so we can
reboot.
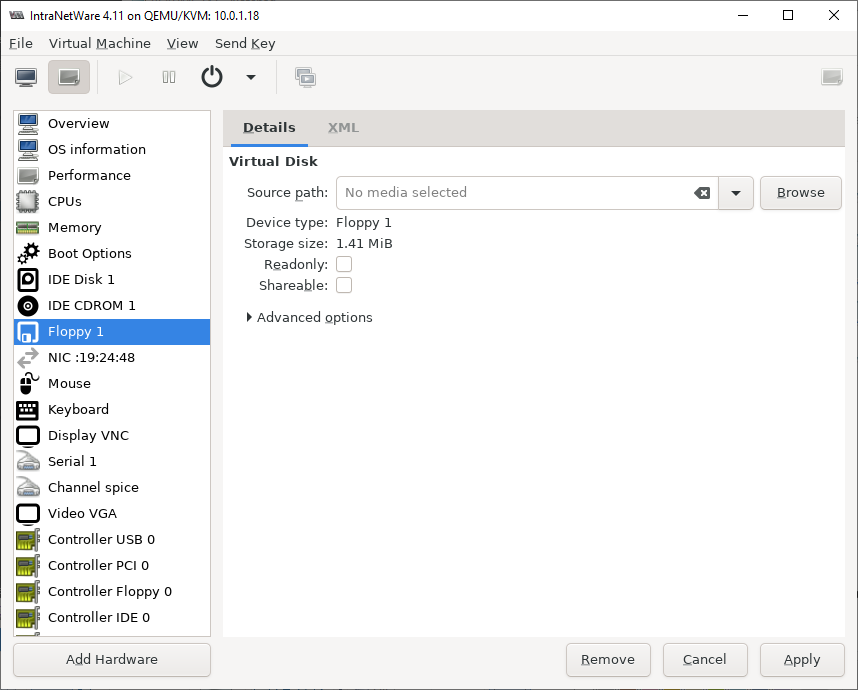
Go back to where you change the floppy image and this time just clear the
the source path then go back to the graphical console.
And hit ENTER...
And hit ENTER some more to reboot
DOS is now installed!
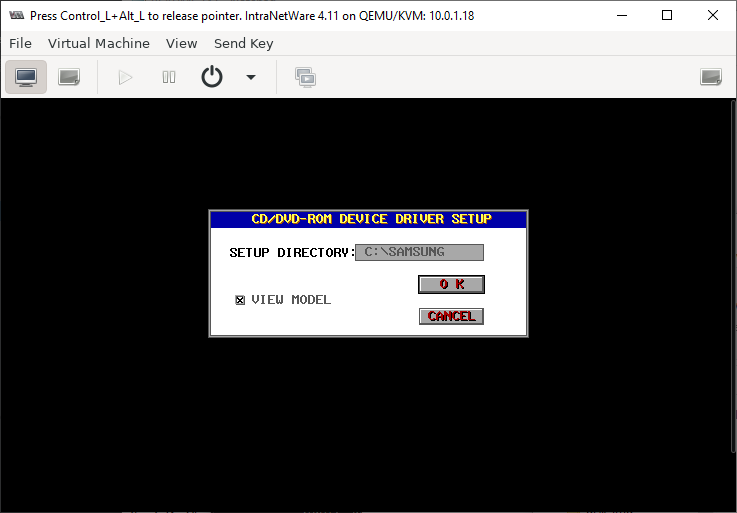
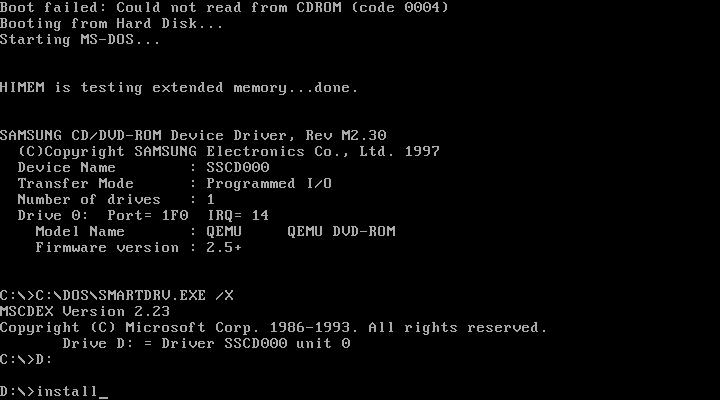
Now we need a CD-ROM driver! I've used this Samsung driver
for years - seems good enough. No idea what the license is though - I guess the
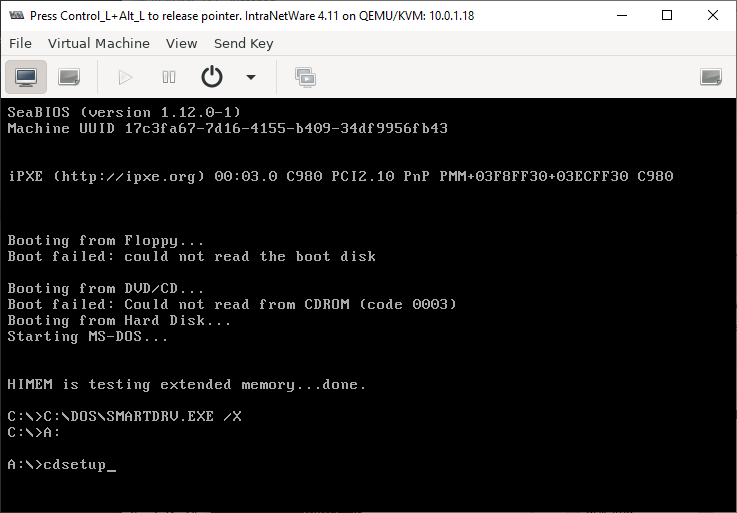
FreeDOS driver is probably a good alternative. Anyway, mount the sscd disk image...
then run cdsetup.exe
and then just it enter to install
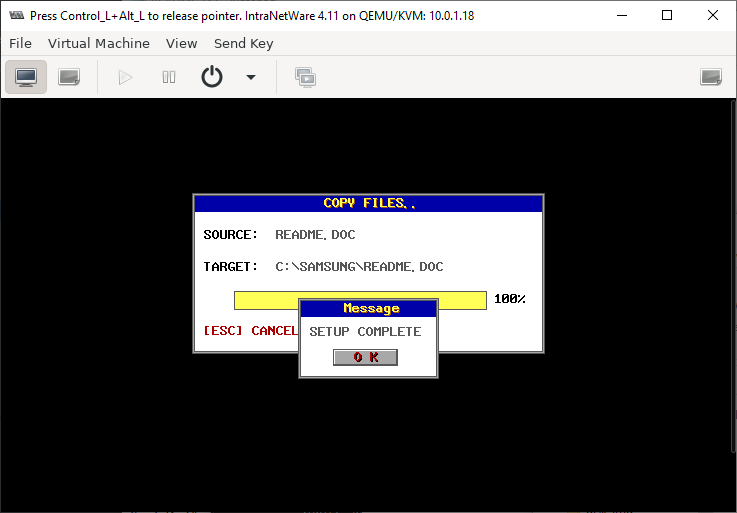
installing... Given its only copying a few kilobytes it takes a weirdly long time
for me.

And done! hit enter
Remove the floppy disk
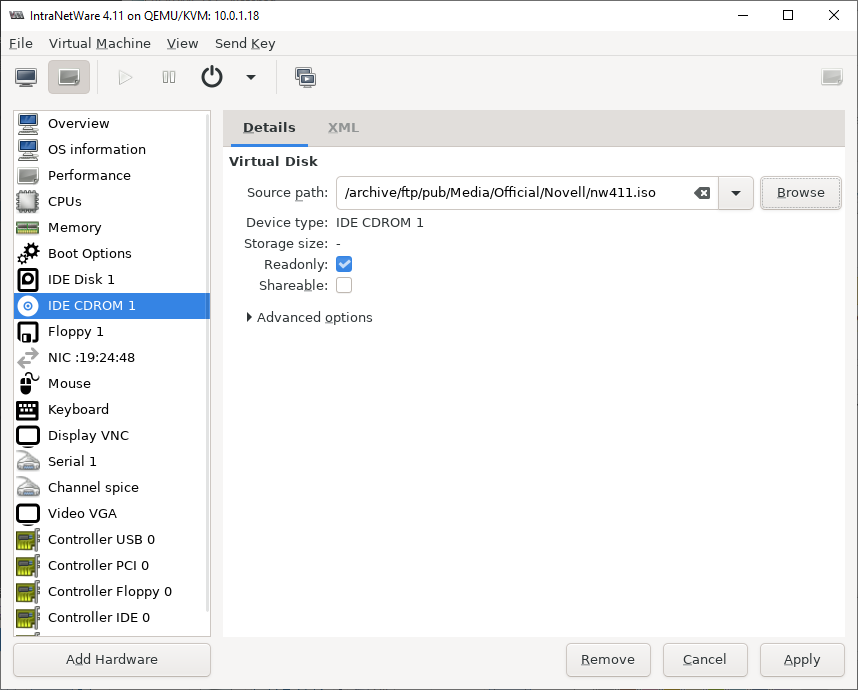
Then put the NetWare 4.11 CD back in if it got removed, then reboot the VM. We're
going to install NetWare next! You'll need to do a "Force Reset" - a regular Reset
won't work with DOS or NetWare.
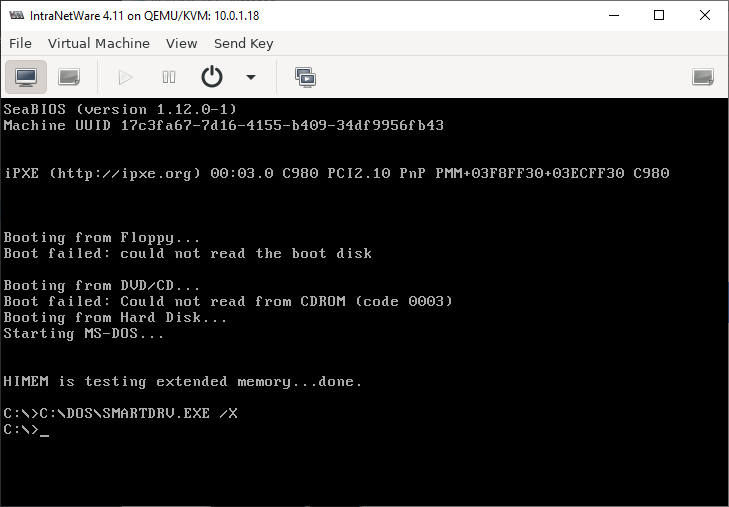
And now we're at DOS and we even have a CD-ROM driver!
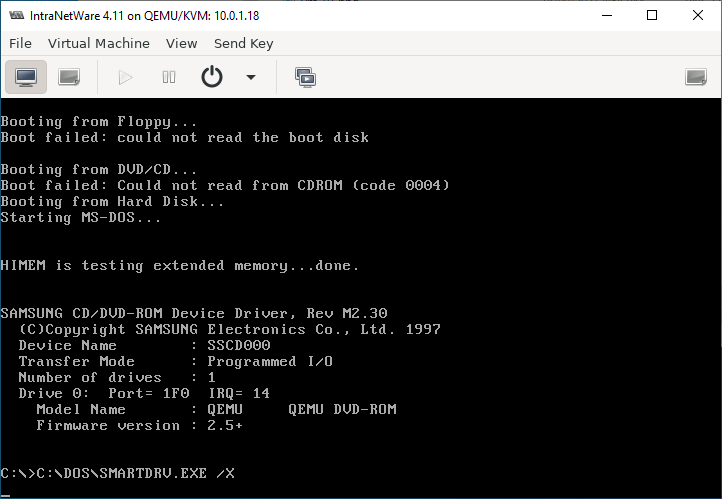
We can now proceed with the NetWare installation. I created a snapshot at this point so that if anything goes wrong I don't need to suffer through the DOS installation again. The snapshots button is the second from the right on the toolbar in this screenshot (in the middle-ish).
NetWare Installation
Mount the CD-ROM image if you haven't already, then switch over to D: drive and run install. Running install like this (without the /nad) switch will enable hardware auto-detection which may make things easier. For me the install program took several seconds to start after I hit enter - not sure why but I left it and it did eventually start.
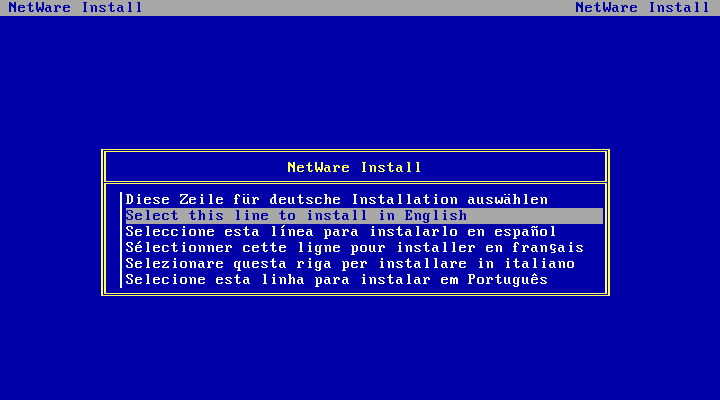
Select the line you can read! Sadly I can only read english so default option it is...
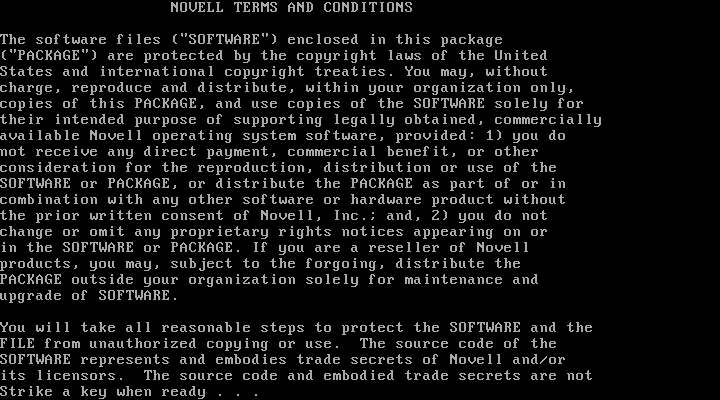
Now we must read the license. You'll get to hit any key four times to get through all of it.
We're installing A Server! (hit enter)
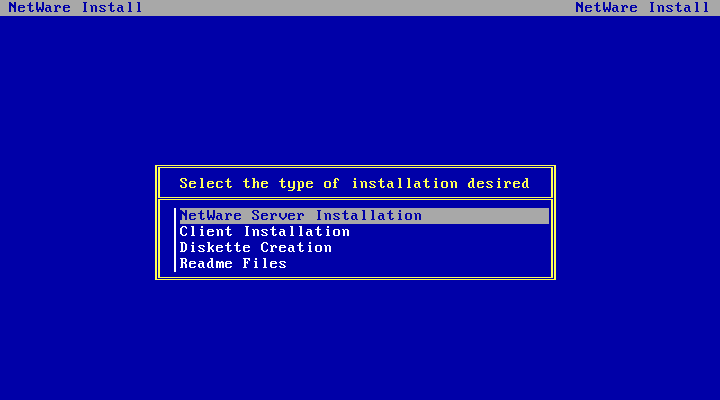
Choose the first option. The SFT III option is for clustering - IIRC it requires identical hardware. I guess you maybe could do SFT III with VMs, might even be easier than with real hardware. Maybe I'll try that out some other day - probably would need a second license disk.
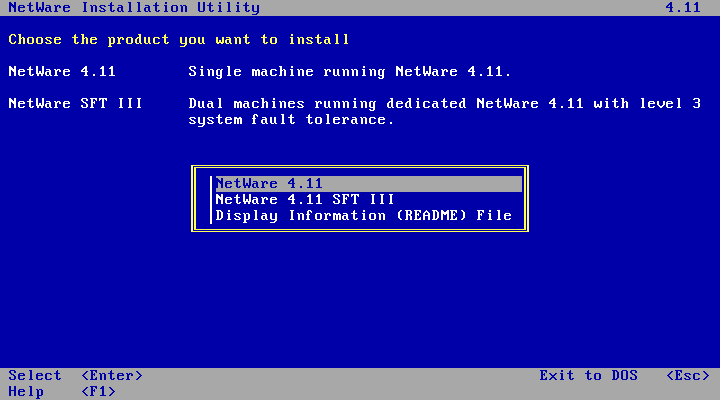
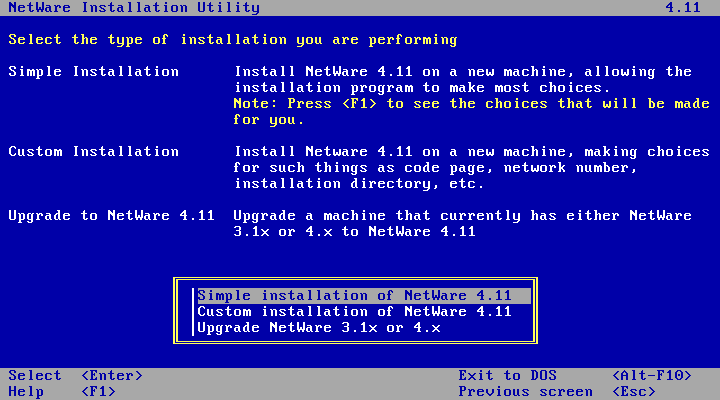
We'll go with Simple Installation for this little tutorial. The Simple Install will automatically give remaining unpartitioned space on the disk to the SYS partition. The manual suggests it will put NWFS filesystems on any other disks too. It will also auto-generate an IPX internal network number, create the NetWare Directory Services hierarchy with a single container for all objects.
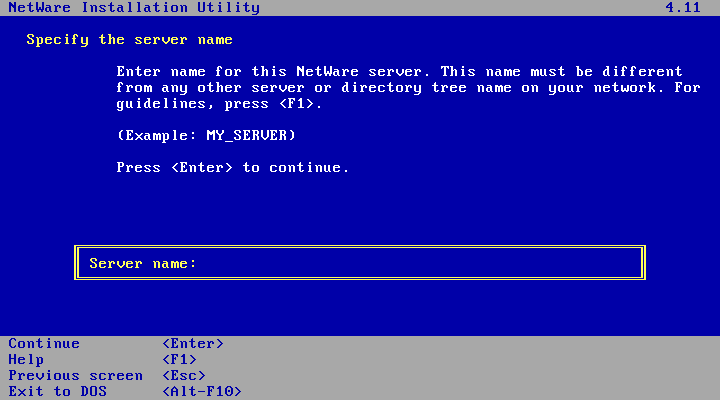
Now you get to name your server! I'm calling mine VNW411 (for Virtual NetWare 4.11)
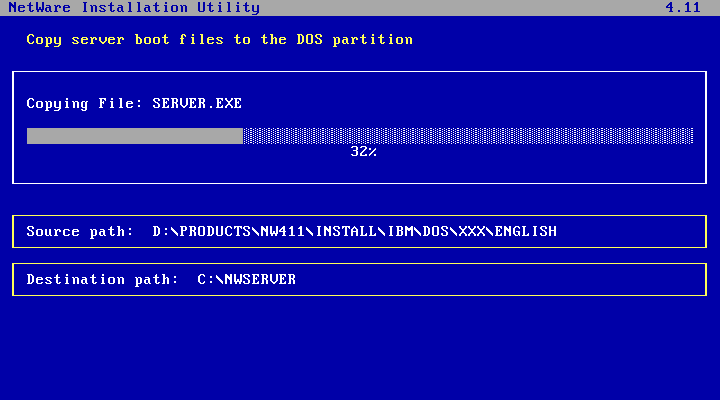
The server startup files will now be copied over to the DOS partition.
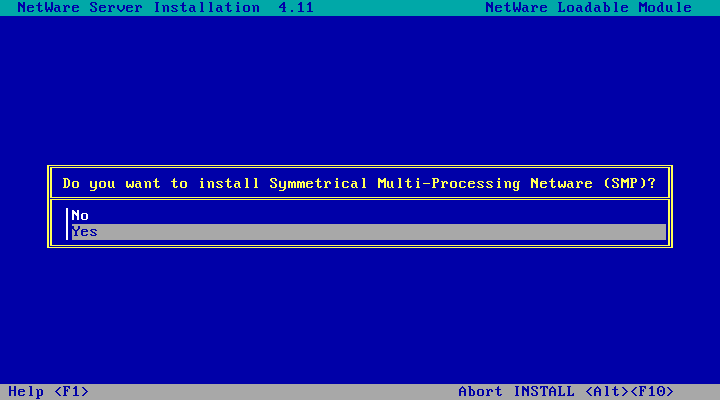
Then you'll see a few other things flash past as the NetWare kernel starts up. The rest of the install will happen from within netware itself. Because we created the VM with more than one CPU you'll land at a screen asking if you want to install SMP support. SMP seems to work just fine here so pick Yes
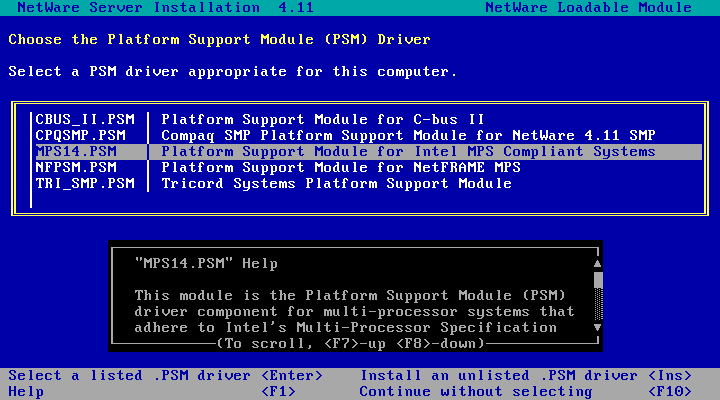
KVM and QEMU are emulating an Intel MPS Compliant System so pick that option (the default).
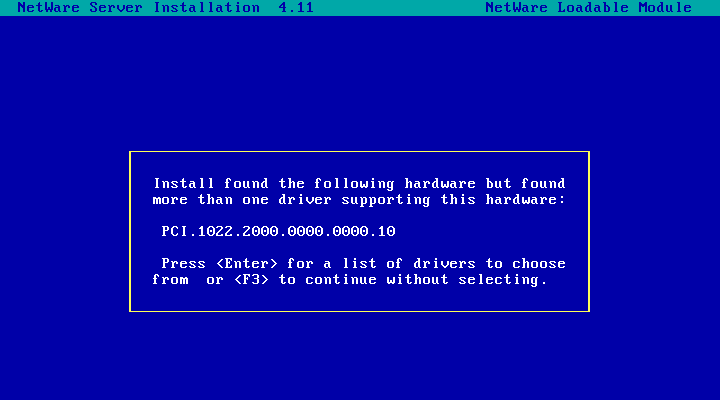
Hardware auto-detection will run and it will find our NIC. Apparently there are multiple drivers that match so we'll have to pick one.
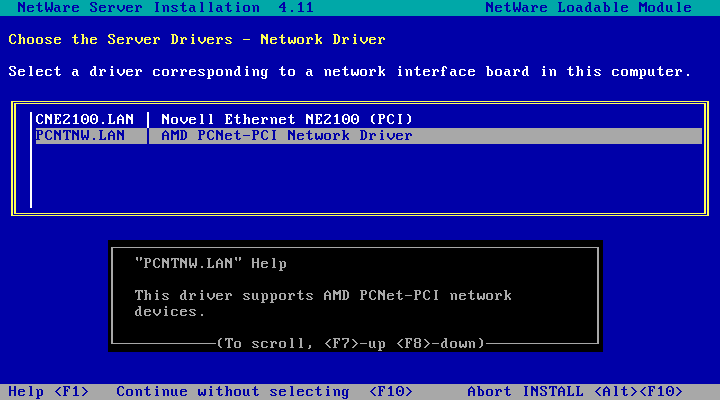
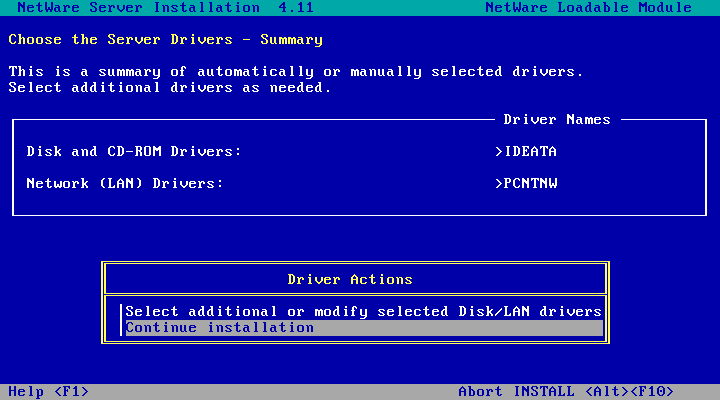
The option I picked in my trial run last time (which seemed to work) isn't in the list! I guess it must have come with SP8a. Oh well, we'll give PCNTNW.LAN a go. If that doesn't work we may have to install a Support Pack before getting the network up.
Done picking drivers - Continue the installation! (hit enter)
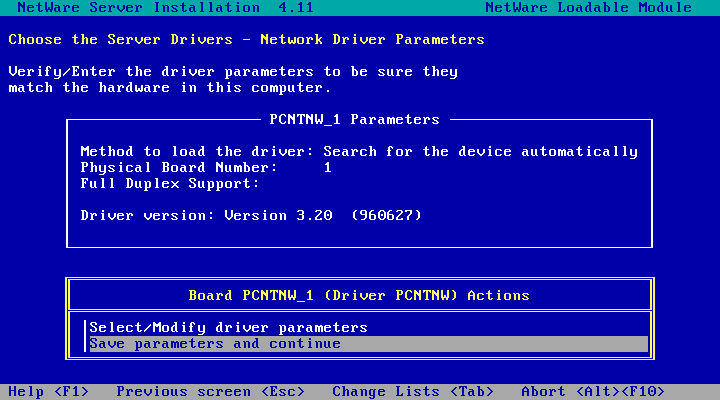
Time to configure driver parameters! Choose Select/Modify driver parameters
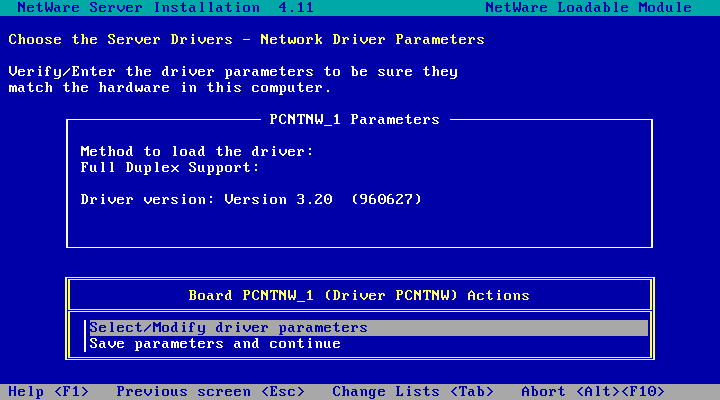
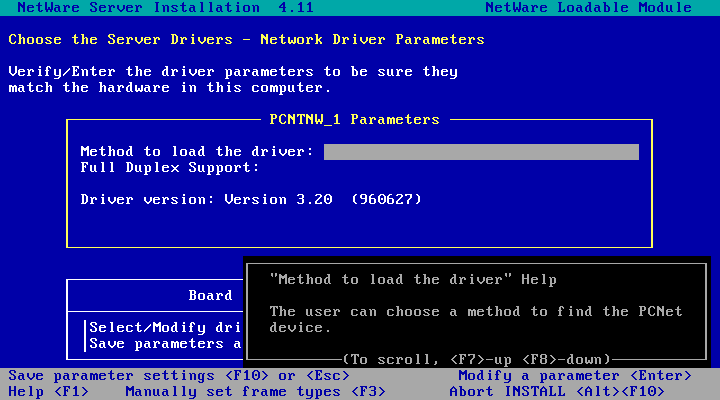
Then hit enter on Method to load the driver
And choose Search for the device automatically
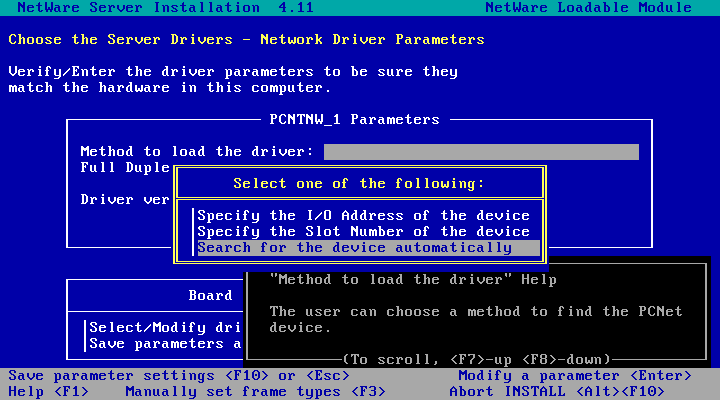
Then hit F10 or Esc to save parameter settings
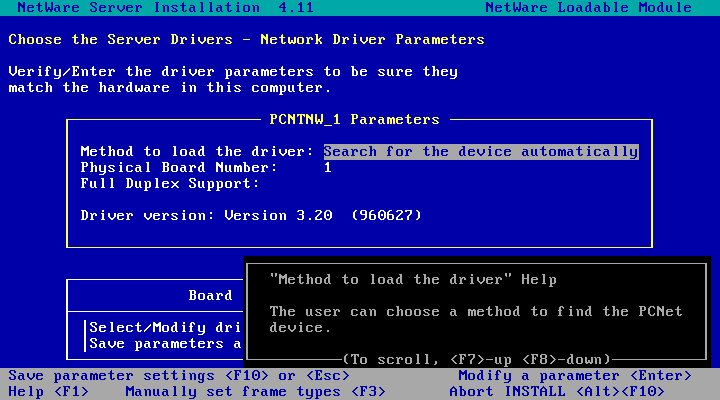
Then go down to Save parameters and continue and hit enter
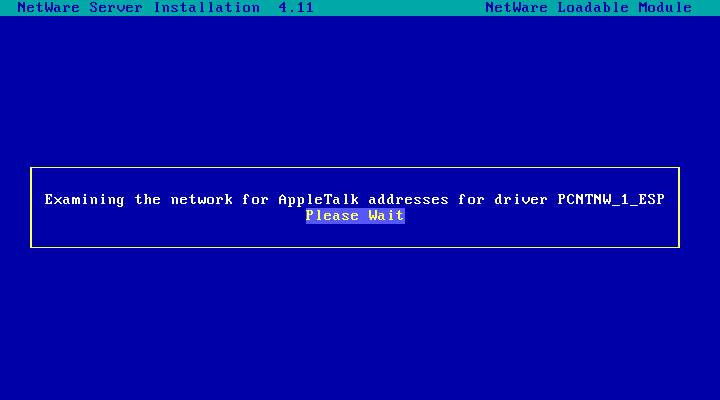
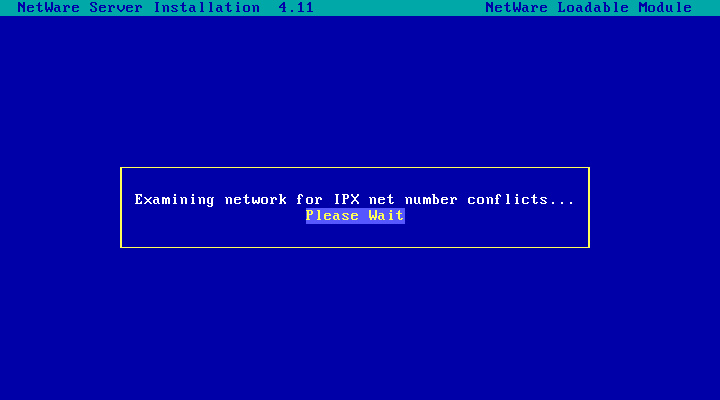
NetWare scans the network for address conflicts
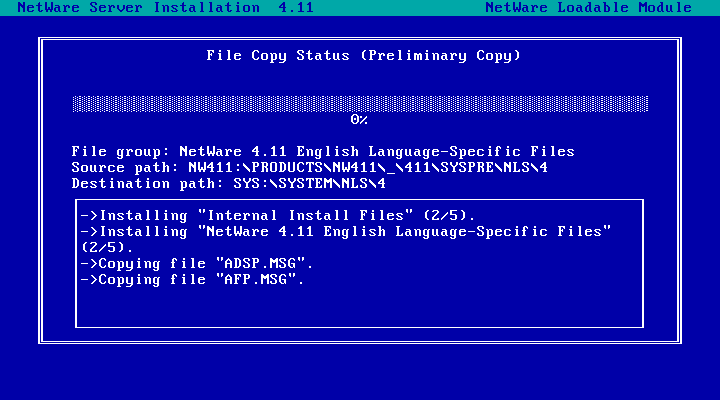
Then it mounts the CD-ROM and proceeds with the preliminary file copy. This is copying all the startup stuff that lives on the NWFS SYS: volume (rather than the DOS partition the previous copy operation put stuff on).
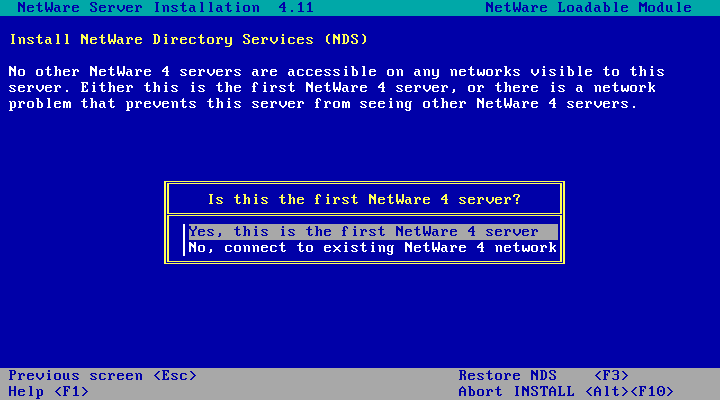
For this we're installing the first and (so far at least) only NetWare 4 server. If there is already another NetWare 4 server visible on the LAN you'll get another prompt here asking if you want to install into one of the detected NDS trees. Select Yes, this is the first NetWare 4 server
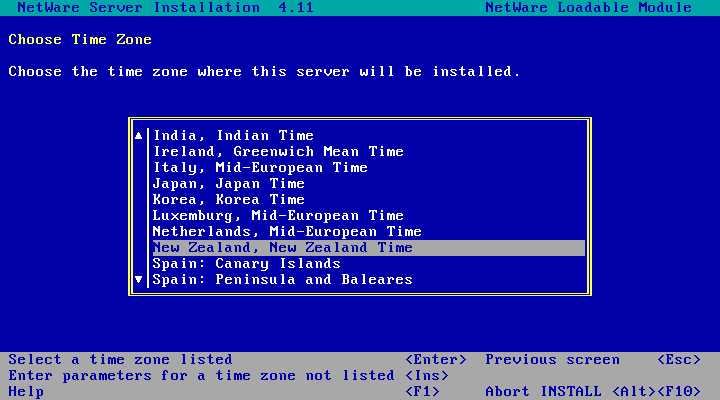
Pick your timezone...
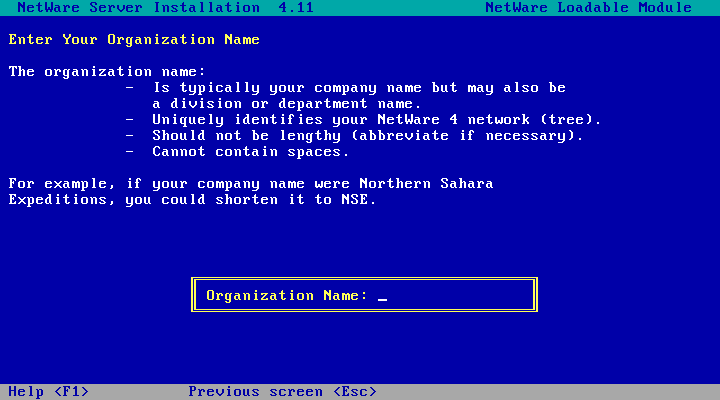
Then choose an organisation name. This is going to be the name for the NDS tree. I'm calling mine ZXNET.
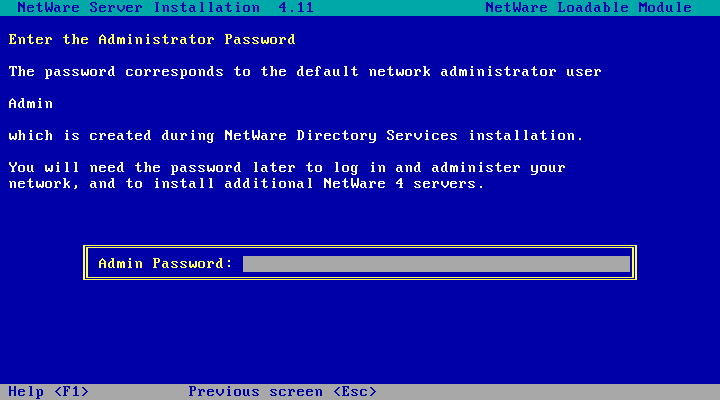
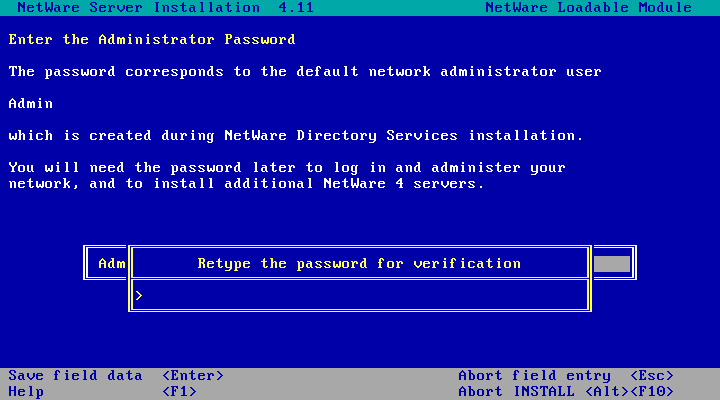
Then you get to pick an admin password. You'll need to enter this twice.
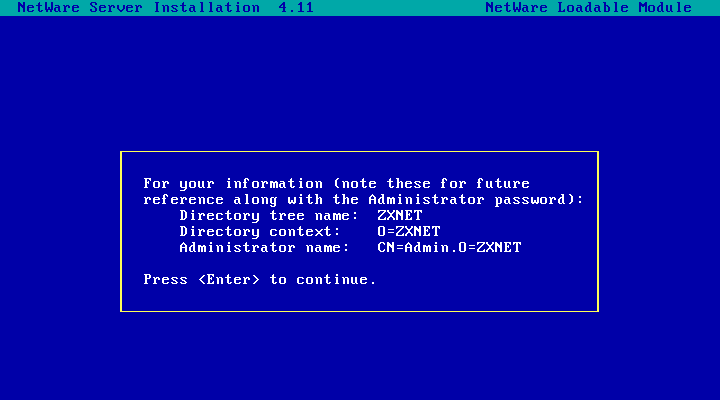
A bunch of stuff will flash past as NDS is installed and the tree created. Then you'll be given the details for your admin account.
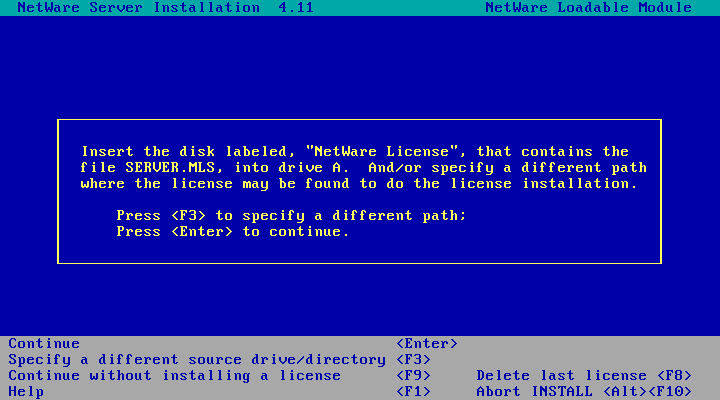
And this is where your license disk is required. Go mount the floppy image for your license disk and hit enter to install the server license.
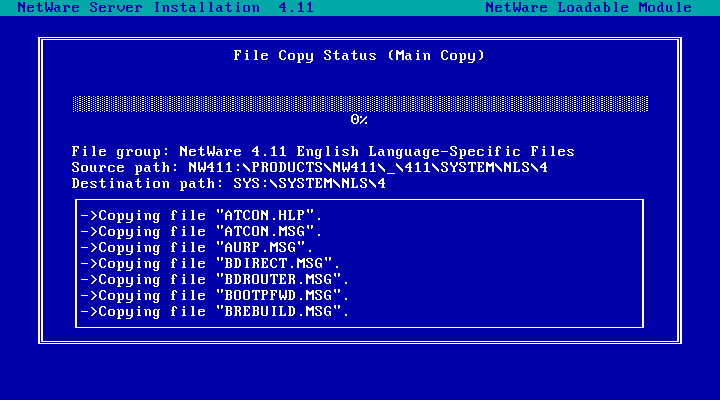
The installer will very quickly search the floppy for a license and install it. If that worked it will then proceed with the main file copy - this is the longest of the three file copies as the simple install option copies all of the install files from the CD to the SYS volume. This should mean when we come to installing other things like NetWare/IP later we won't need the CD. You can probably go make a cup of tea or coffee.
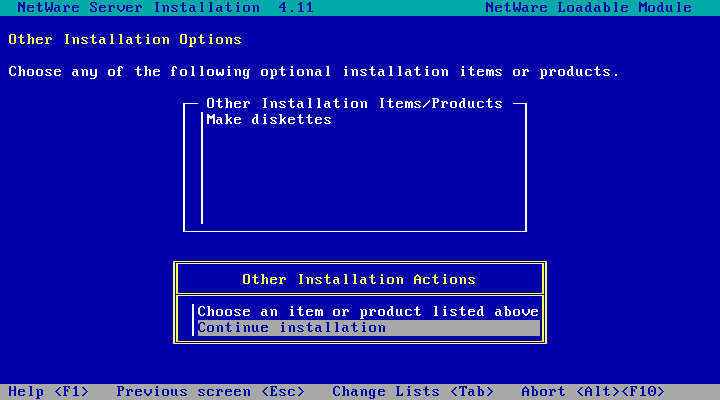
Once the main copy has finished you'll be given a list of install options. There isn't anything interesting here (IIRC you can do the Make diskettes thing from any DOS machine using the NetWare 4.11 CD - the screenshot after the license bit sows a "Diskette creation" option which should do the job). So choose the Continue installation option.
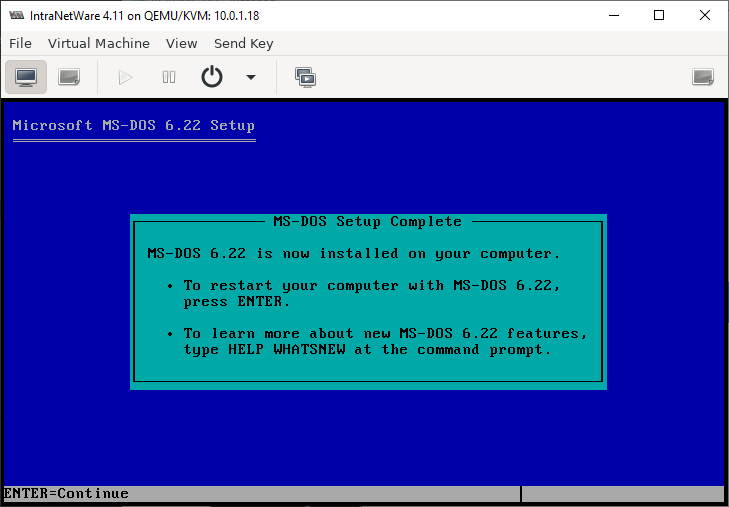
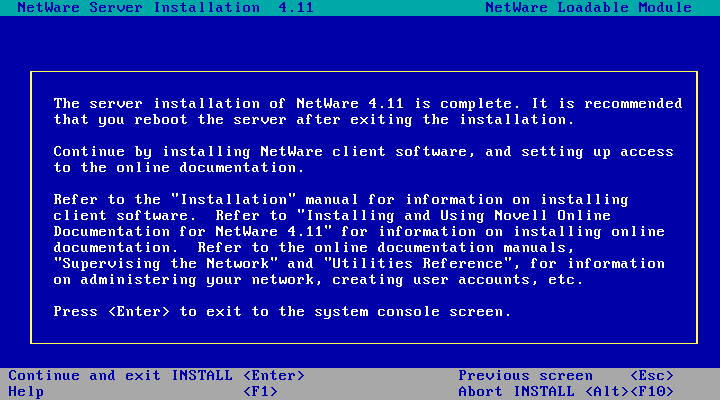
Install finished! hit enter to exit the installer.
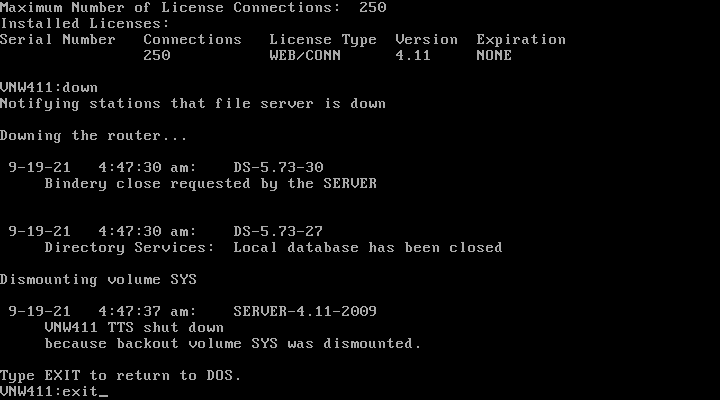
At the command prompt, type down and hit enter to shutdown the server
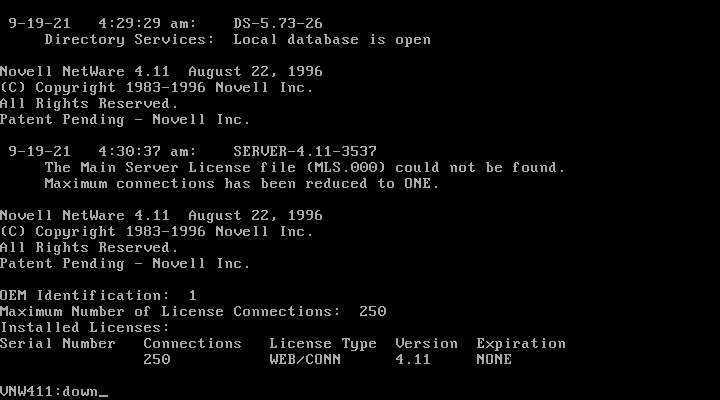
Then type exit and hit enter to exit back to DOS. You might then want to create a snapshot so you can get back to your nice clean netware install later should anything go wrong.
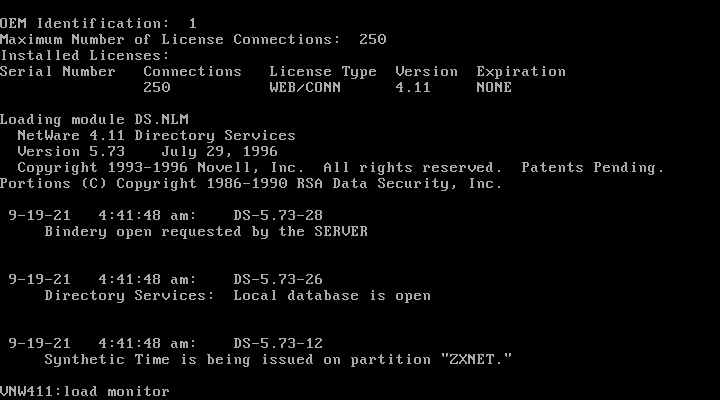
To start the server back up again, change into the nwserver directory and run server.exe:

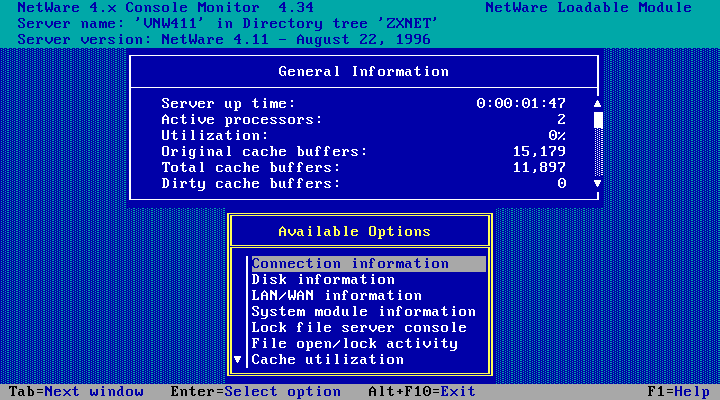
It should only take a second or two to boot up. At the prompt you can type load monitor to load the console monitor NLM.
This tool lets you monitor the server status. I usually just leave this running all the time and only exit out of it when I need to do other things like change config.
If you leave it idle long enough (about 10 minutes) the screen saver will start. One snake per CPU. The higher the CPU utilisation the longer the snakes and the faster they move.

You may notice that even though NetWare claims its idle, the VM is actually using quite a lot of CPU:

This is because NetWare doesn't idle the CPU when its doing nothing.
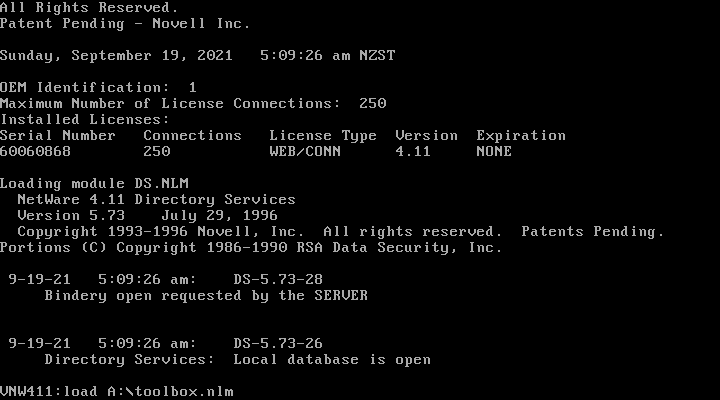
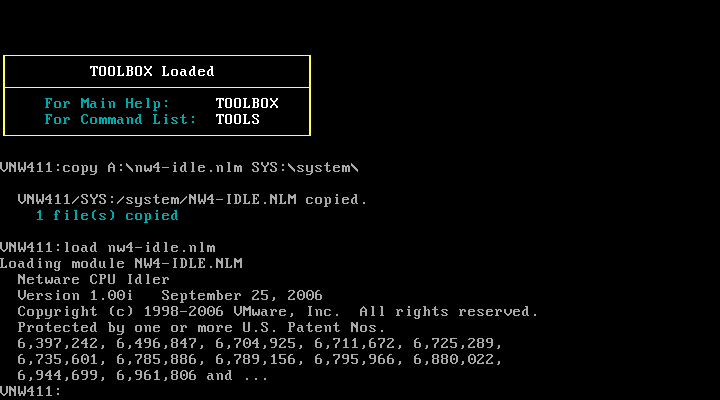
To fix this you need nw4-idle.nlm. Right now with no clients setup the easiest way to get it on to the server is with TOOLBOX.NLM (distributed as tbox7.exe with a readme). To make things easy, here is a disk image with both files! Mount the disk image then run load A:\toolbox.nlm
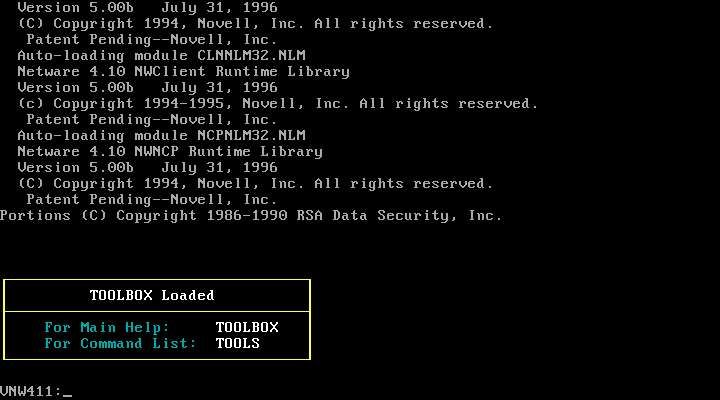
Toolbox loaded!
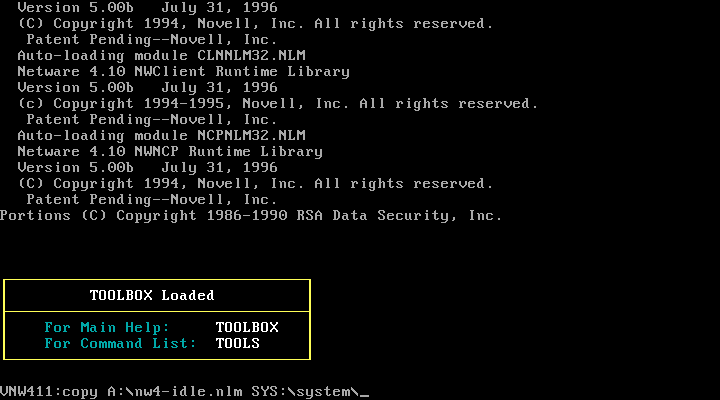
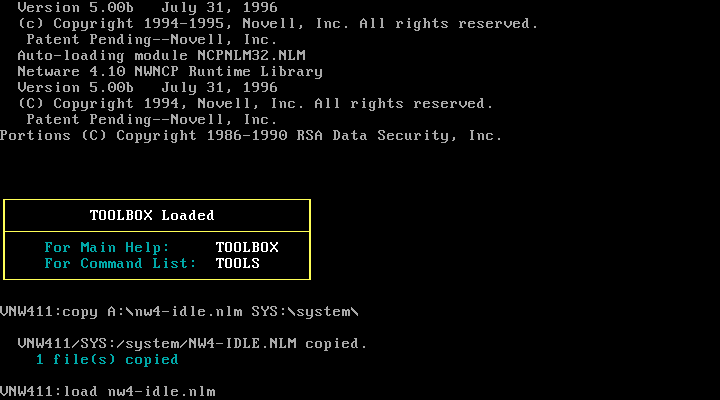
For some reason the netware server console doesn't have a file copy command. Thats one of the things toolbox.nlm gives us - so now copy nw4-idle.nlm from the floppy disk to the system directory with the command copy A:\nw4-idle.nlm SYS:\system\
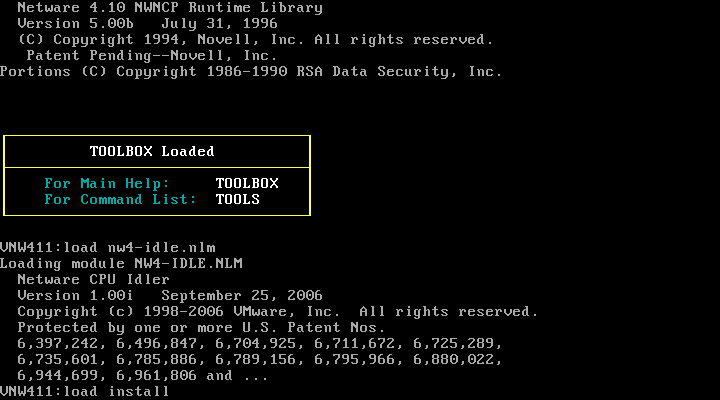
File copied! Now we can load the idle NLM with load nw4-idle.nlm - this should reduce host CPU usage somewhat
NLM Loaded!
And CPU usage has reduced, though only by a bit. Possibly nw4-idle.nlm doesn't support idling multiple processors (I can't find any documentation for it).

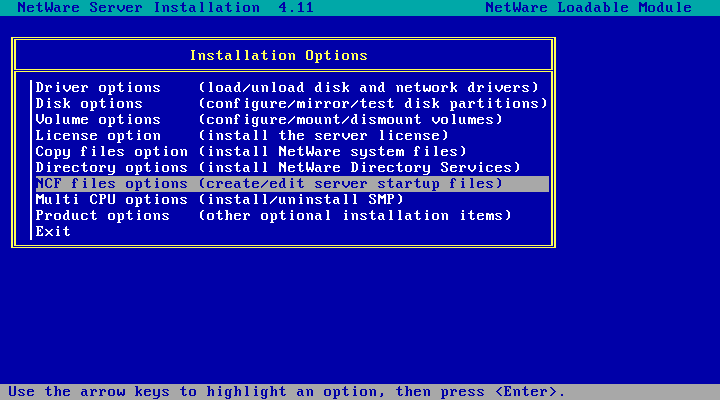
Disabling SMP support fixes this and with the help of nw4-idle.nlm brings host CPU to near nothing when NetWare itself is idle. To disable SMP support, run load install, select Multi CPU options then choose Uninstall SMP. You'll have to restart NetWare for the change to have an effect.
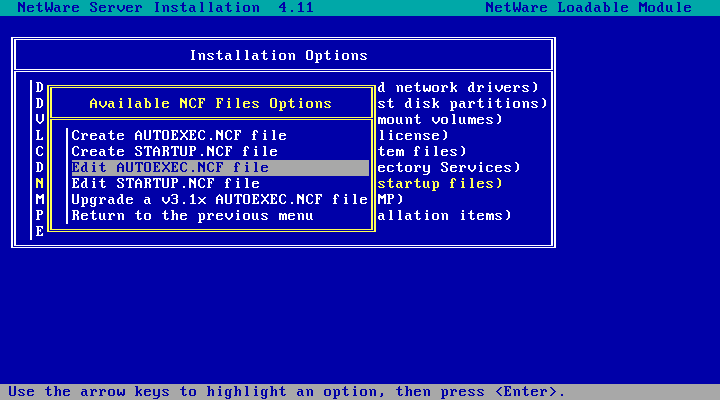
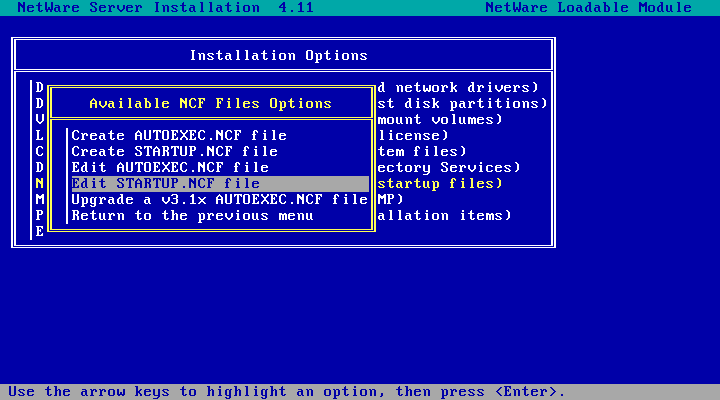
So that nw4-idle.nlm loads on every startup we'll edit autoexec.ncf. To do this, run load install
Then select NCF files options from the menu
Then choose Edit AUTOEXEC.NCF
Scroll down to the bottom of the file (Page Down works)
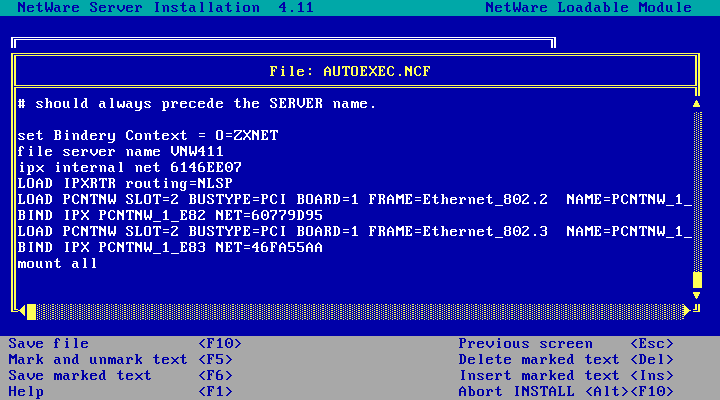
Add load nw4-idle.nlm to the end of the file and, while we're at it, add in load cdrom.nlm on a separate line too. This is the NetWare CD-ROM driver which will let us mount CD-ROMs within netware without relying on the DOS driver.
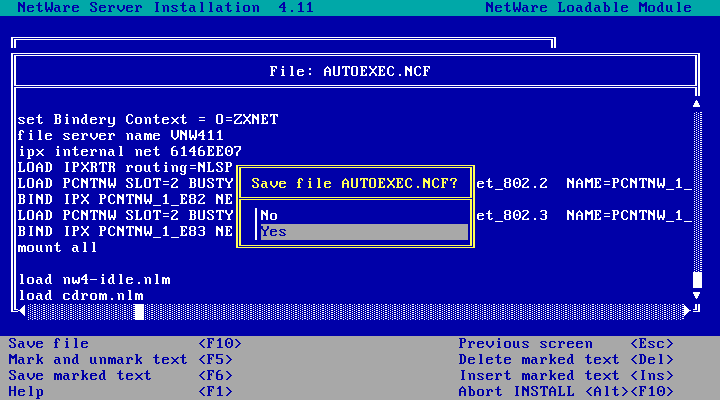
 Hit F10 to save the file
And choose yes to confirm.
 Hit Esc to get back to the main install menu, Hit Esc again to exit and choose Yes again to confirm. You'll be back at the server console again.
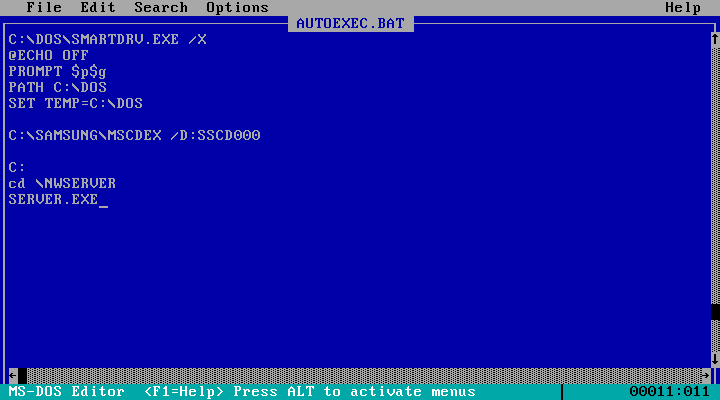
We should probably test our changes so run down and exit to exit out to DOS. While we're here in DOS, lets edit autoexec.bat so that netware starts up automatically:

Then add the following three lines to the end of the file:
C:
cd \NWSERVER
SERVER.EXE
 If you've never used the MS-DOS editor before, hit the Alt key, Enter, use the Down arrow key to select Exit, hit enter, then when asked if you'd like to save hit enter again to select yes.
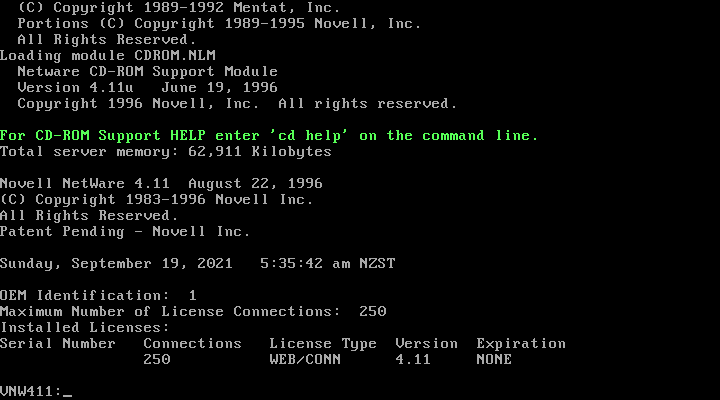
Lets try out both our autoexec.ncf and autoexec.bat changes! Make sure there is no floppy disk image mounted then reboot the VM. You'll need to do a force reset as DOS doesn't support ACPI shutdown/reboot. If everything worked the VM should boot to netware (via DOS),host CPU usage should be nice and low and there will be a green message from the CD-ROM driver (cdrom.nlm) telling us how to get help:
Netware 4.11 is now installed! If you open the monitor (load monitor) you'll see utilisation is now quite high all the time - this is probably because of nw4-idle.nlm. Its probably just running a loop with a low priority that idles the CPU. NetWare doesn't know what nw4-idle.nlm is doing so it just shows up as CPU usage.
Adding Namespaces
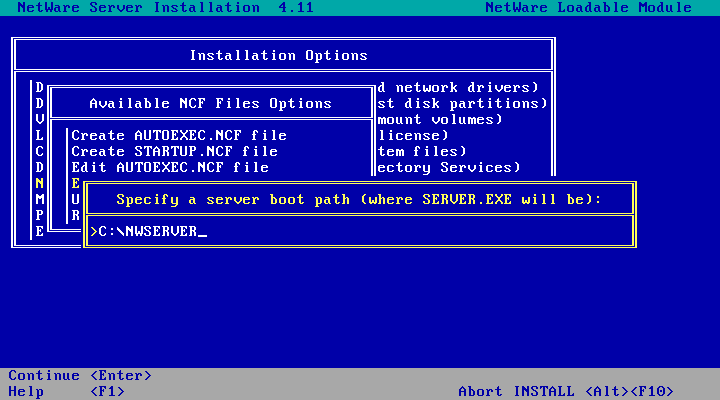
If you want to be able to store long filenames on your NetWare volumes you'll need to add the LONG namespace (on NetWare 4.11, or the OS2 namespace for NetWare 4.10 and older). This module needs to beloaded from STARTUP.NCF which you can edit startup.ncf from the install utility:
The default location should be correct
Add LOAD LONG.NAM to the end of the file after LOAD MAC. Then hit F10 to save the file.
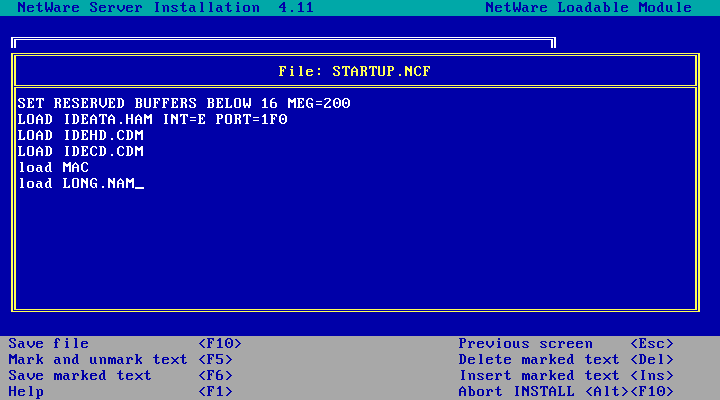
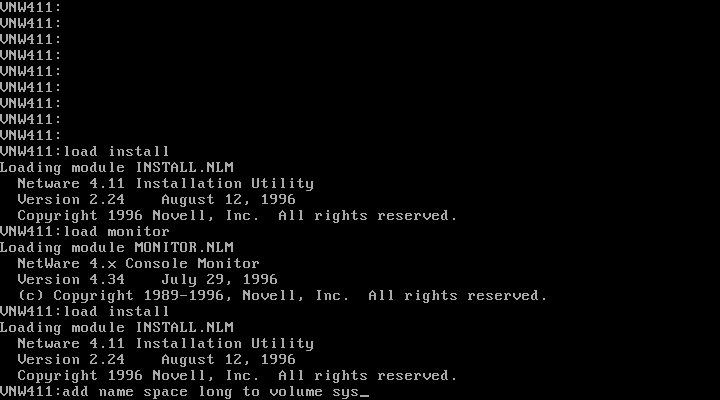
From here you can either reboot the server or type in LOAD LONG.NAM to load the namespace now. Once the namespace is loaded, type add name space long to volume sys to add it to your sys volume.
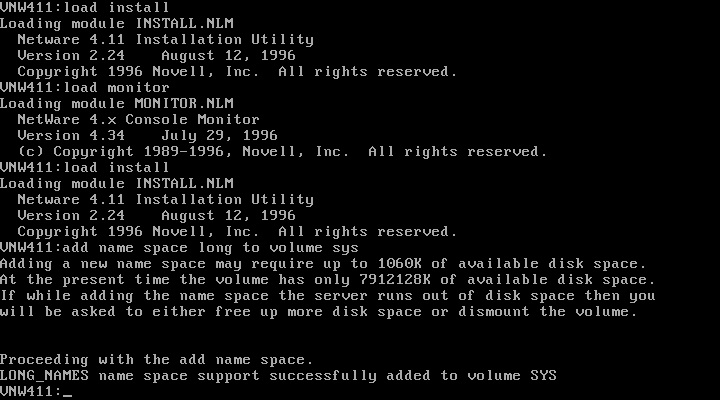
Repeat this for any other volume you'd like long filename support on.
Next Steps
Now that NetWare is installed and on the network you've got a few options with what to do next:
- Copy PC Client install files
- Install support for Mac OS Clients
- Install the IPX/IP Gateway and browse the web over IPX
- Install SP8a. This isn't the latest Support Pack available (that would be SP9) but its available in ISO form so you can install it right now without needing a workstation setup. If you're going to install other products you're probably better off skipping this and installing Support Pack 9 later when you're done.
- Install NetWare/IP
- Install NetWare 4.11 FTP Services
- Configure NetWare-to-UNIX Printing
- Install the NetWare WEB Server v2.51
- Install NetWare for Macintosh
- Install Support Pack 9 - the latest Support Pack for 4.11
- Setup NetSync if you've got existing NetWare 3.x servers and would like to manage users in one place (NDS)
- Copy toolbox.nlm onto the server and add it to autoexec.ncf so its always available
- Setup a workstation and start playing with netware:
- The CD-ROM contains:
- Client32 for DOS/Windows 3.1x, version 2.11.
- Client32 for Windows 95, version 2.11
- NetWare Client for OS/2, version 2.12
- NetWare Client for MacOS, version 5.11 - but you can't run NetWare Administrator from a Mac
- The VLM client for DOS and Windows 3.1x
- Or you can grab the latest (or any other version) of a client from one of the following pages:
- The CD-ROM contains:
Disclaimer & Comments
I'm not a netware expert, don't have any of those fancy novell certifications and have never administred a netware network; I've just played with it at home occasionally since 2004 or so. Email me if you've got any suggestions or corrections for this page or any extra information you think is worth including here. My address is david at this websites domain name (without the www bit of course).